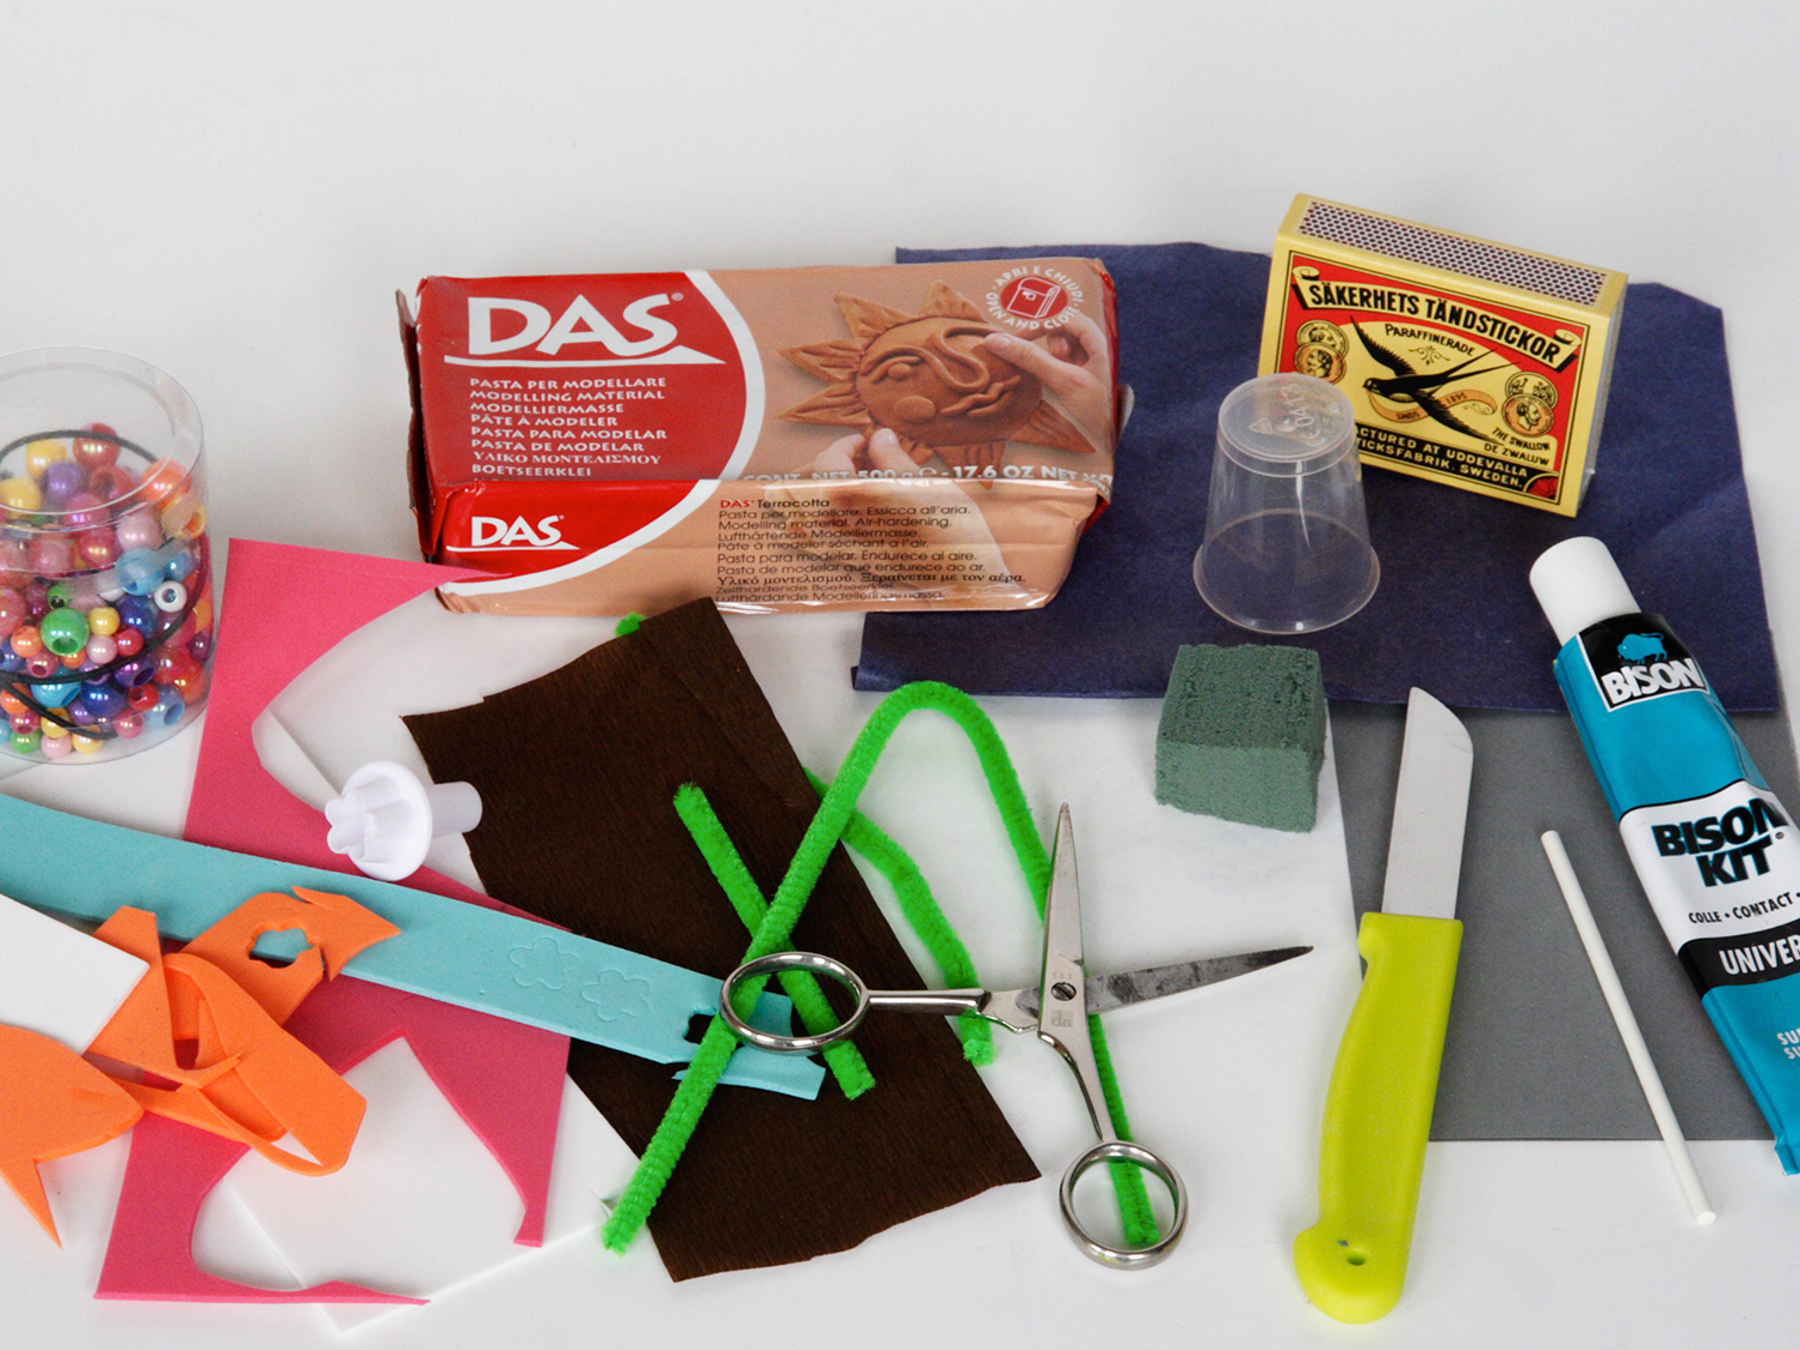
What do you need?
small piece of Oasis
brown crepe paper
pieces of coloured foam
coloured beads
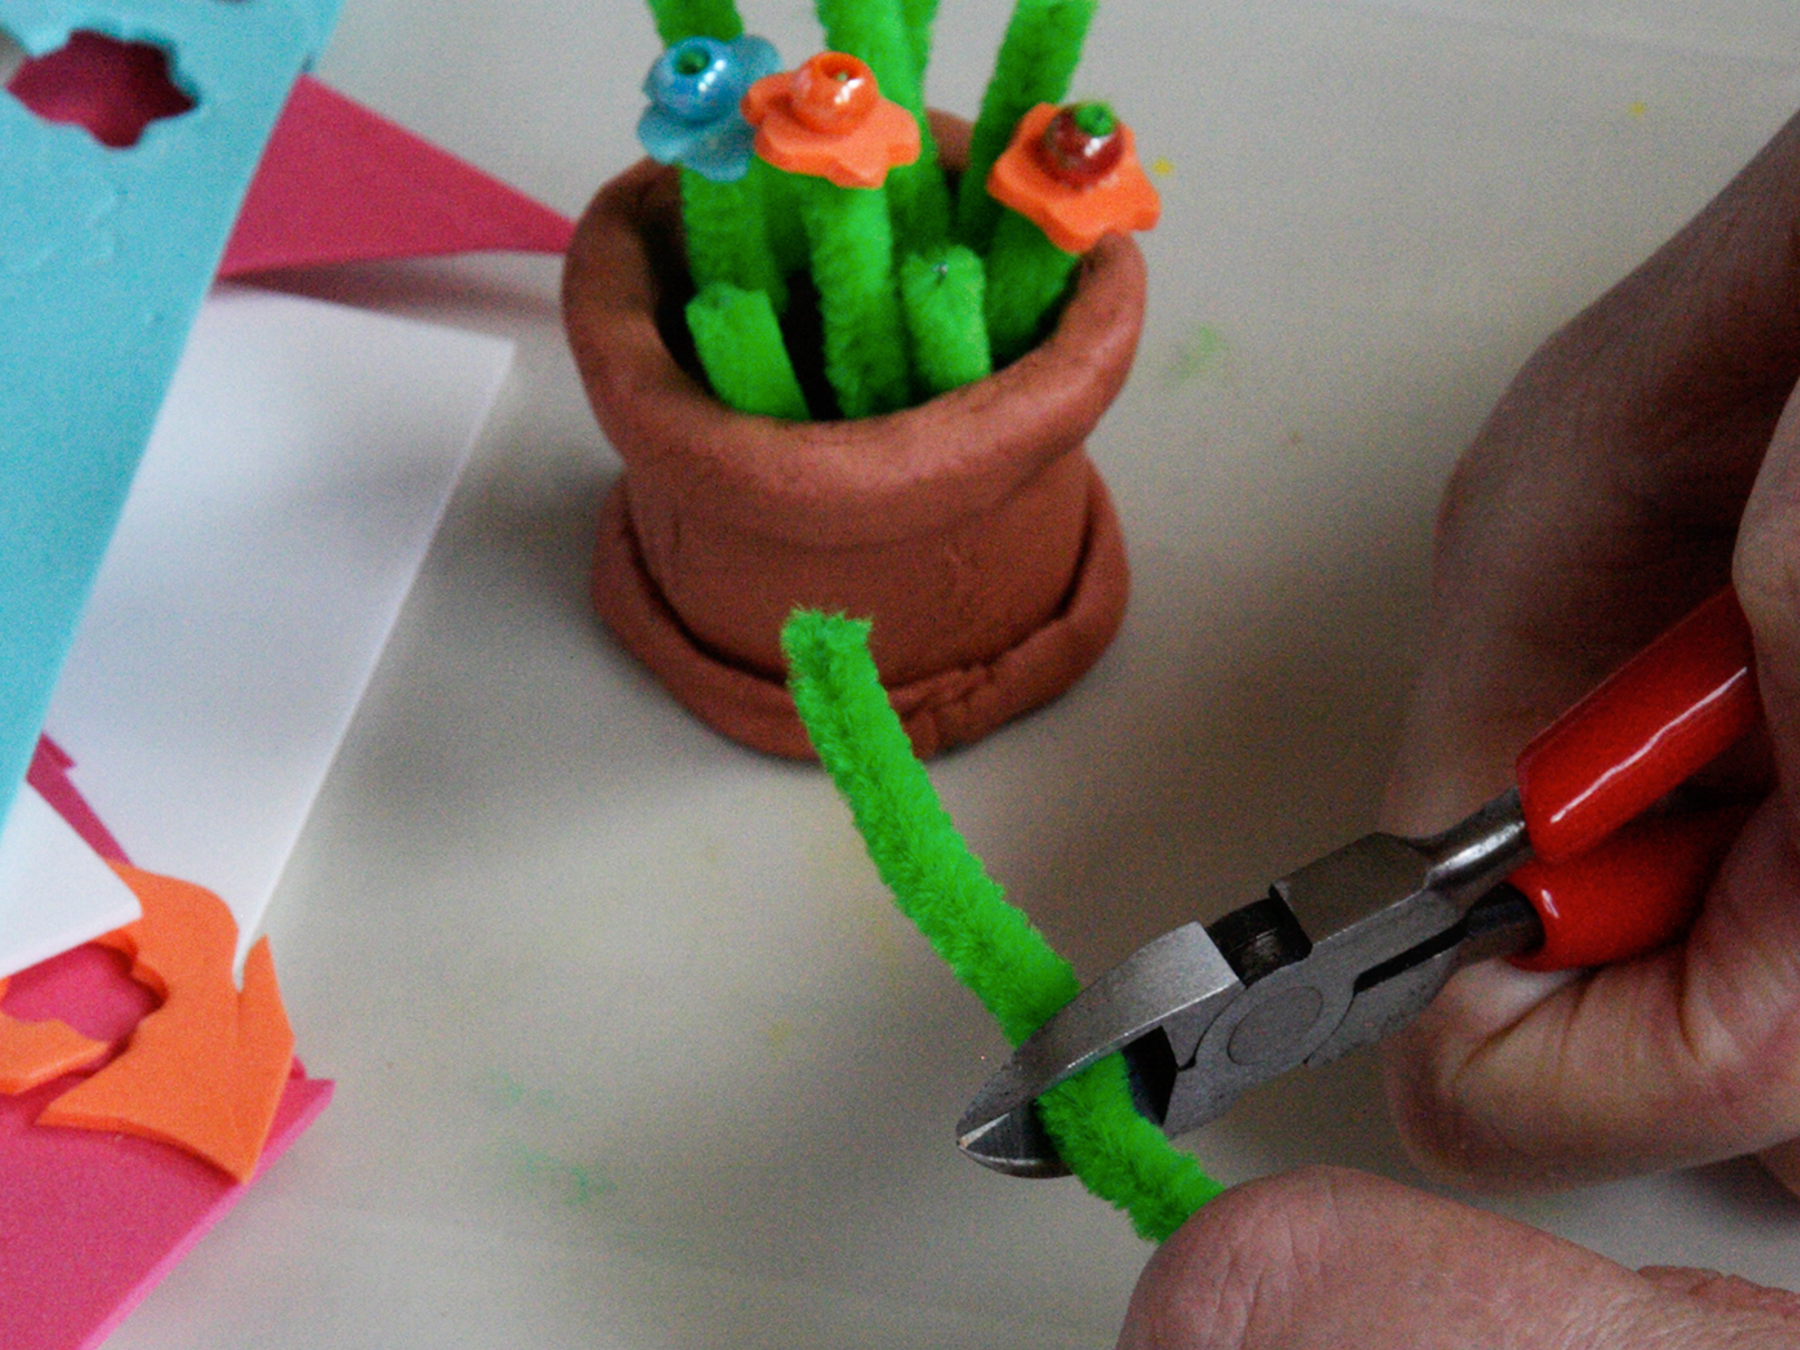
green chenille (pipecleaners)
cutting pliers
scissors
hobby glue
Today we finish the hand clayed mini flower pot we made last week by filling it with some small flowers. It looks cute and it is quickly done!
How to finish the mini flower pot
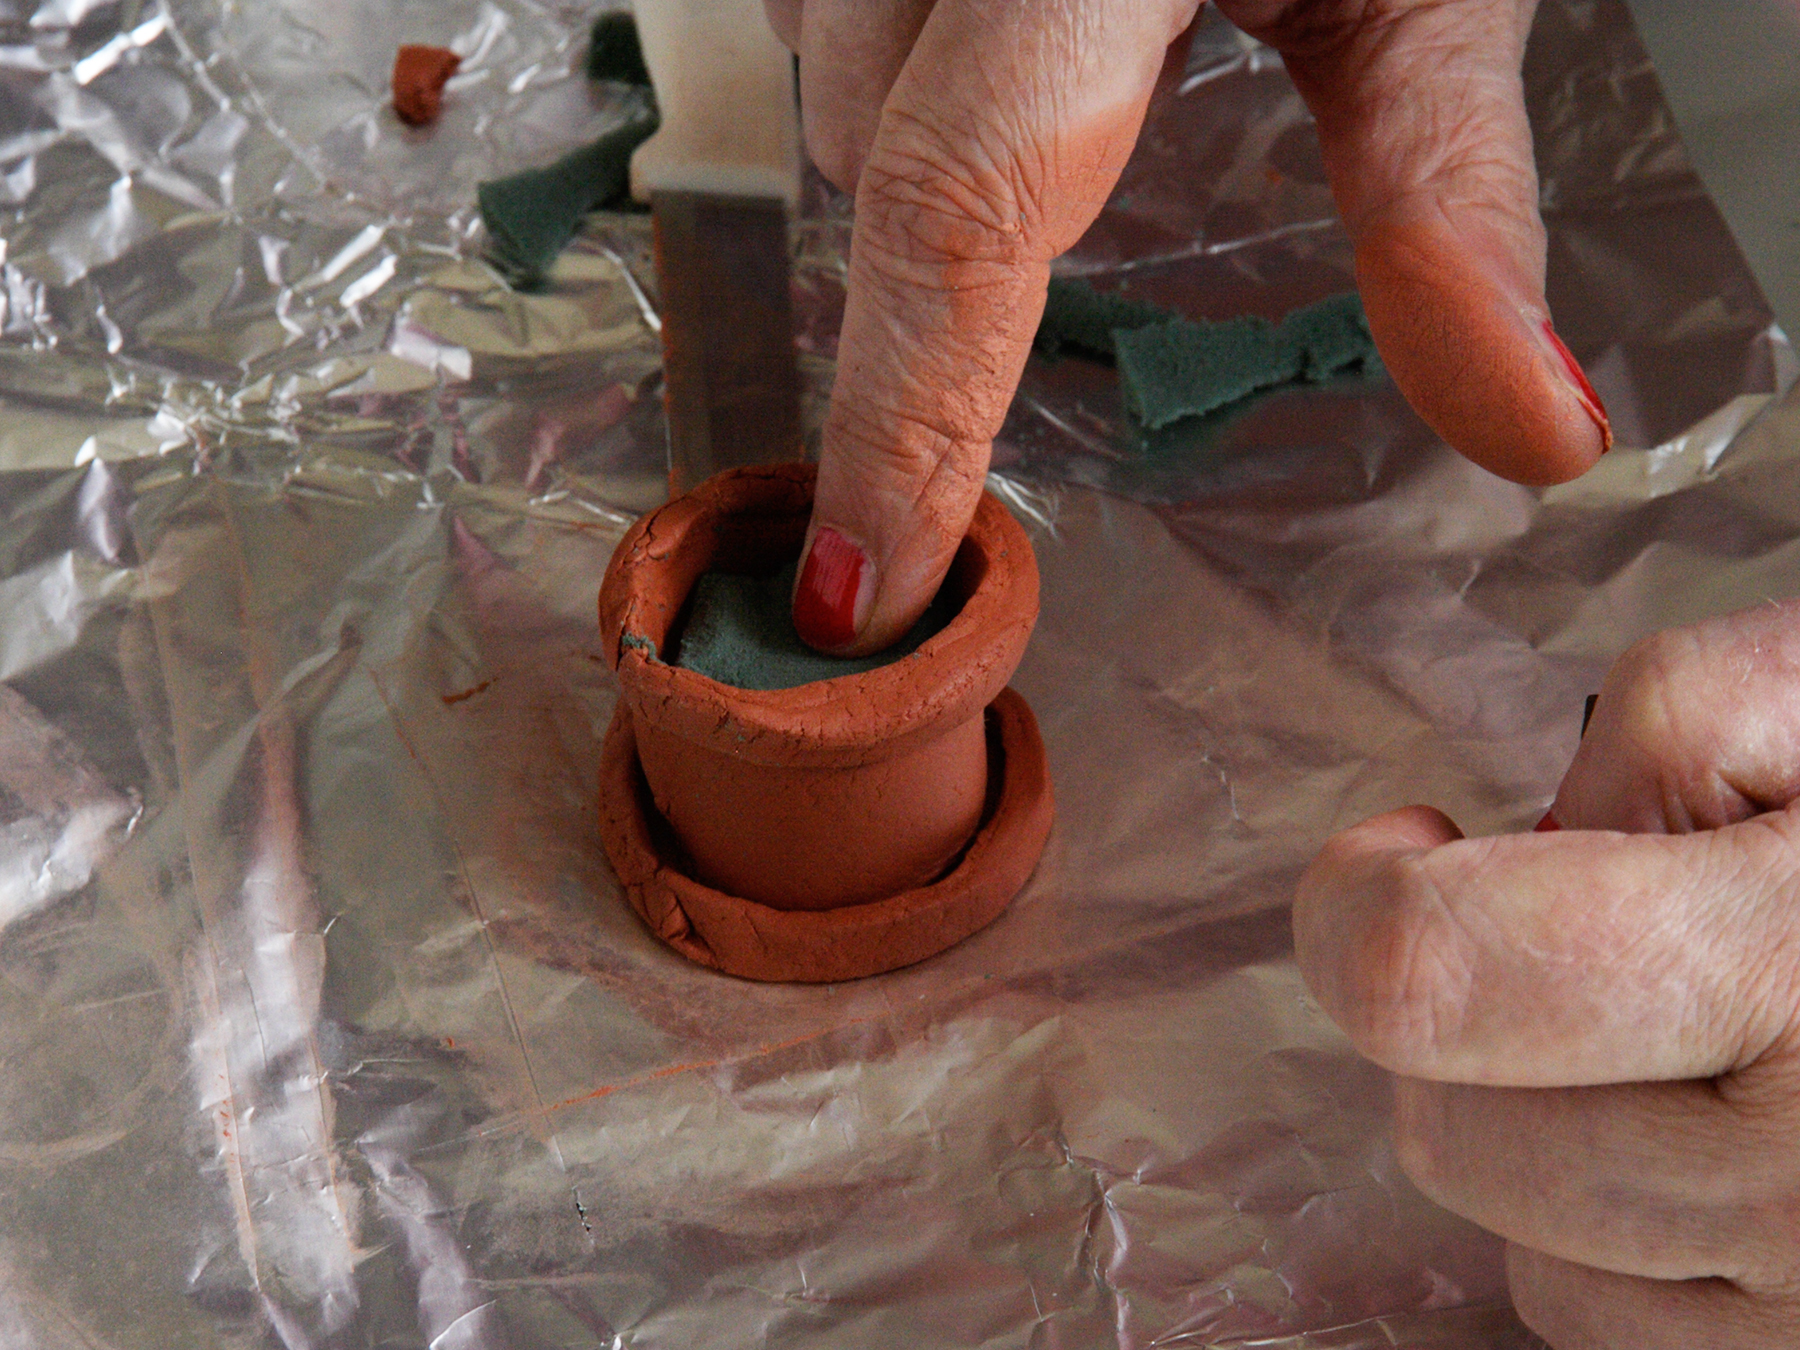
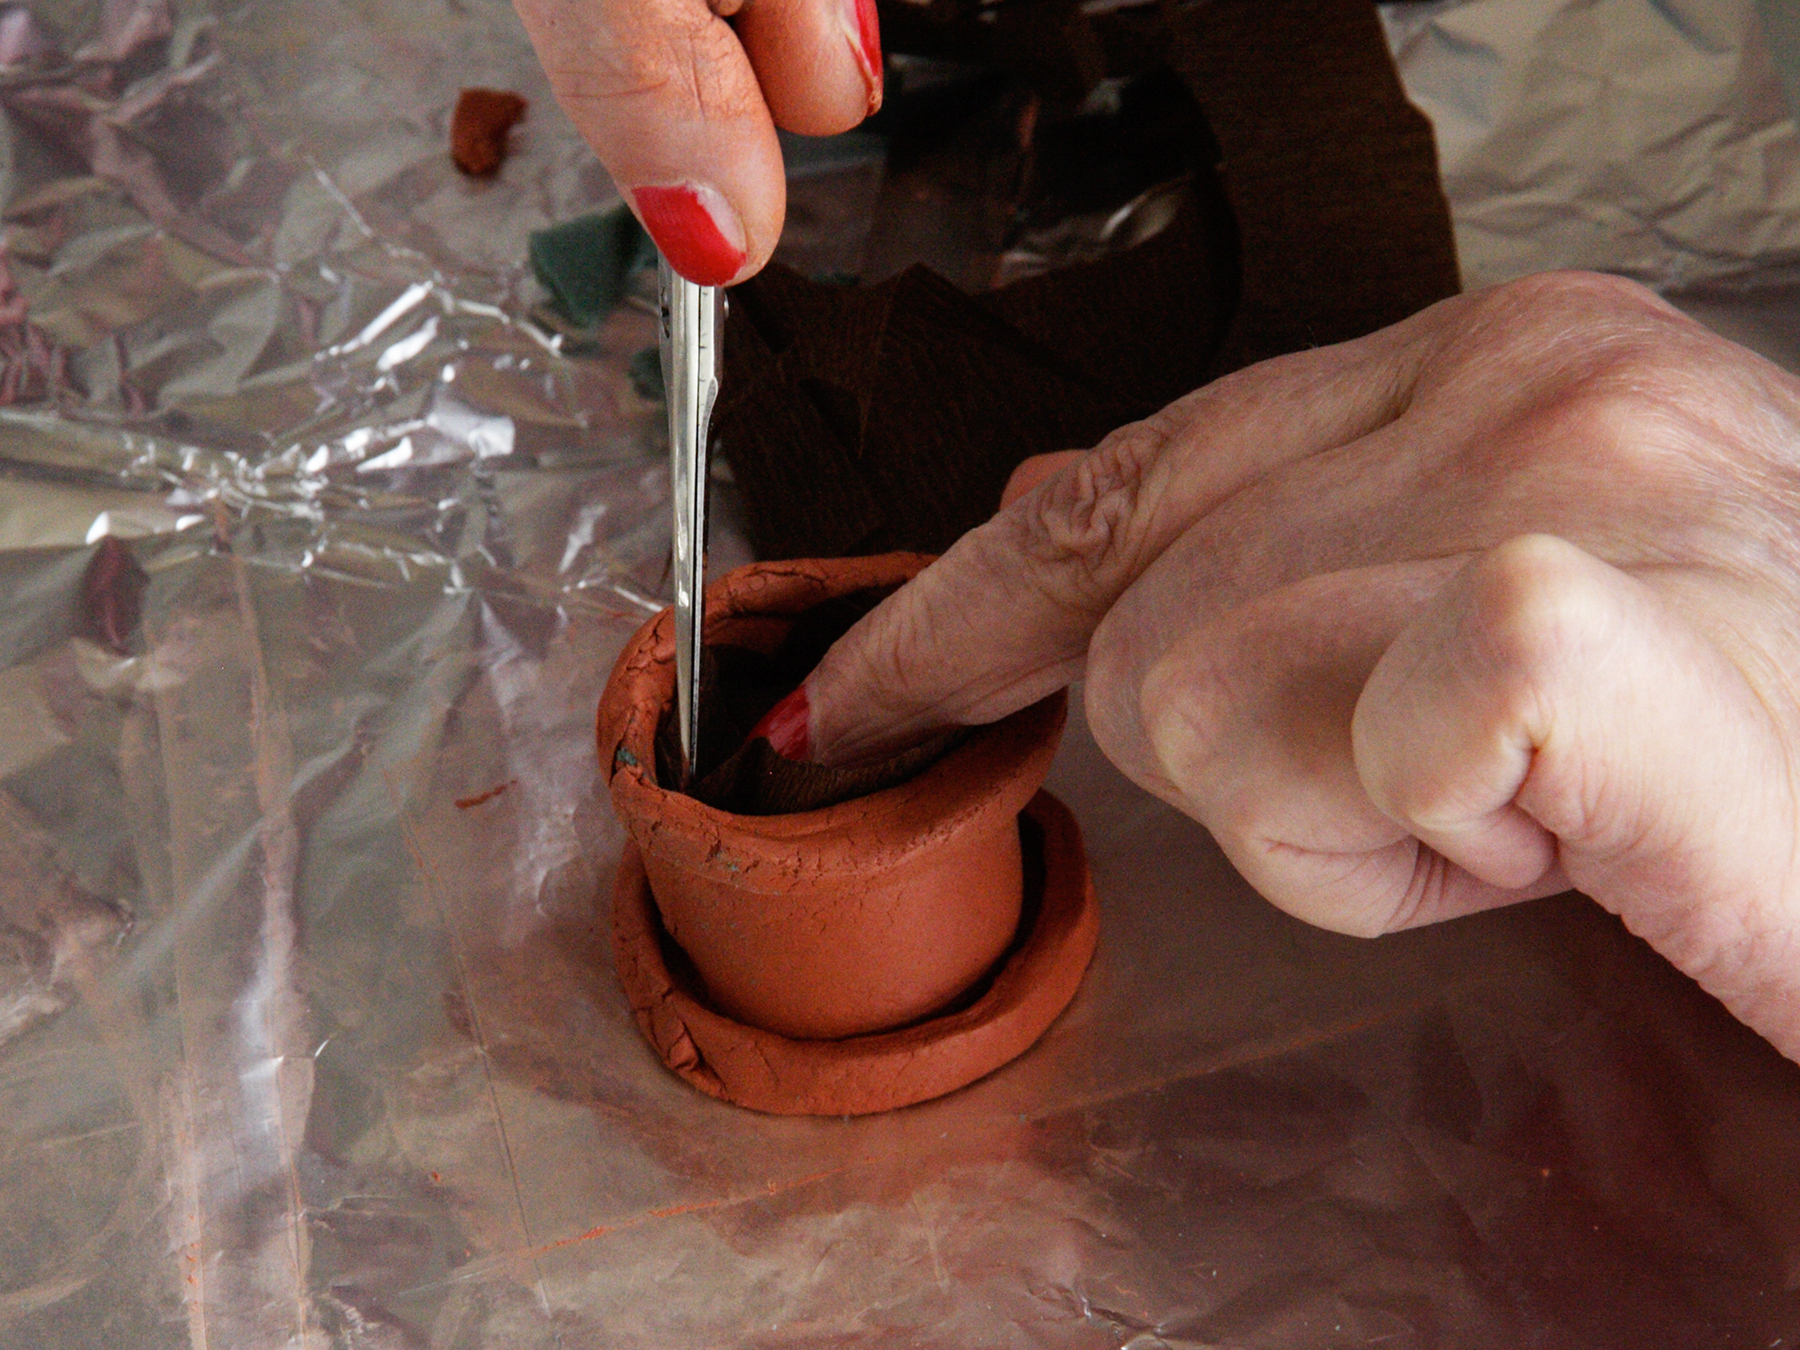

Cut a piece of Oasis to size, press it into the flower pot.
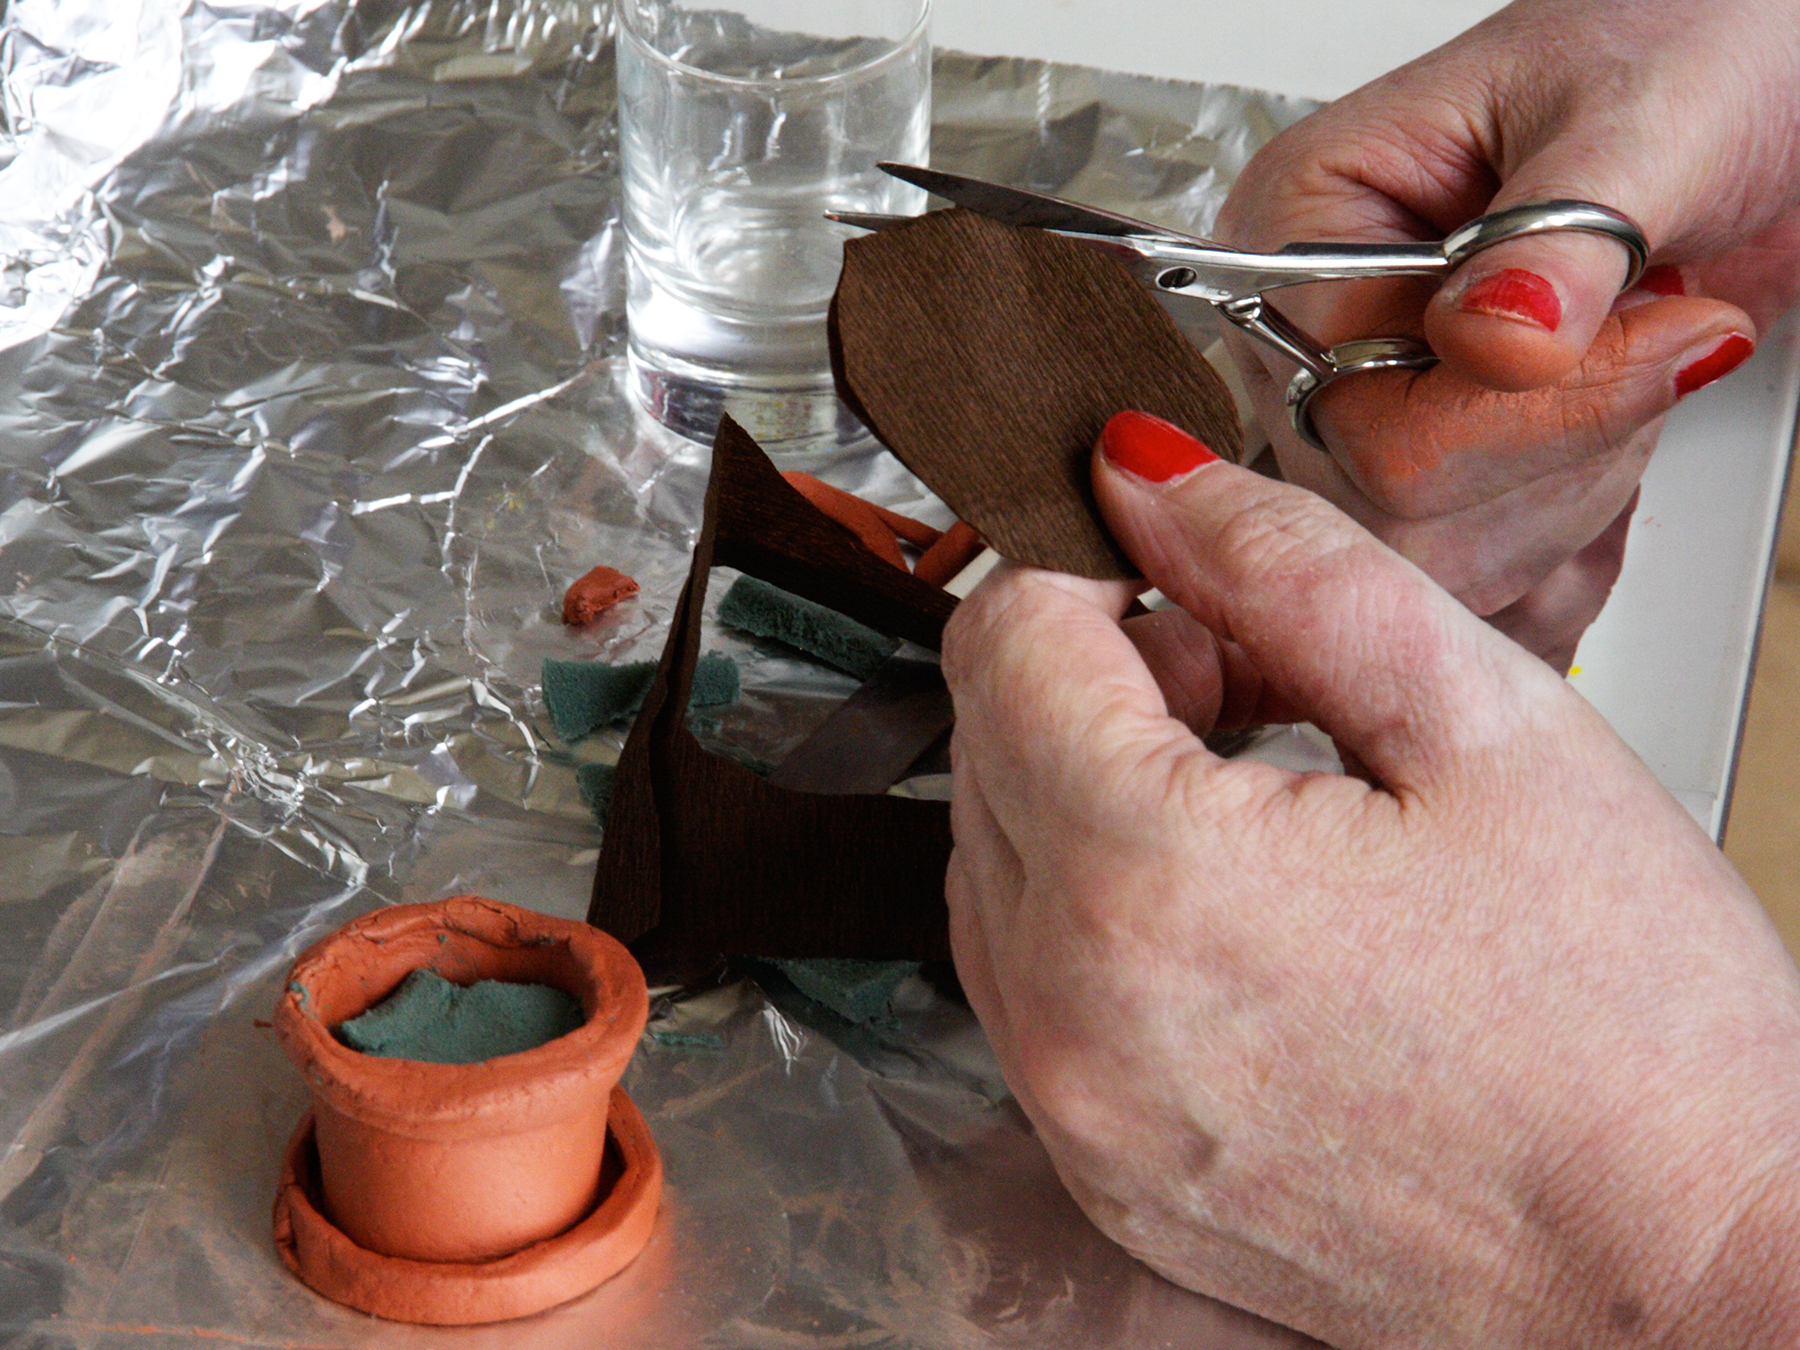
Trace a circle on crepe paper then cut it out.
Using scissors press the paper in between the pot and the Oasis.
Draw flowers on foam or press the shape with an icing cutter.
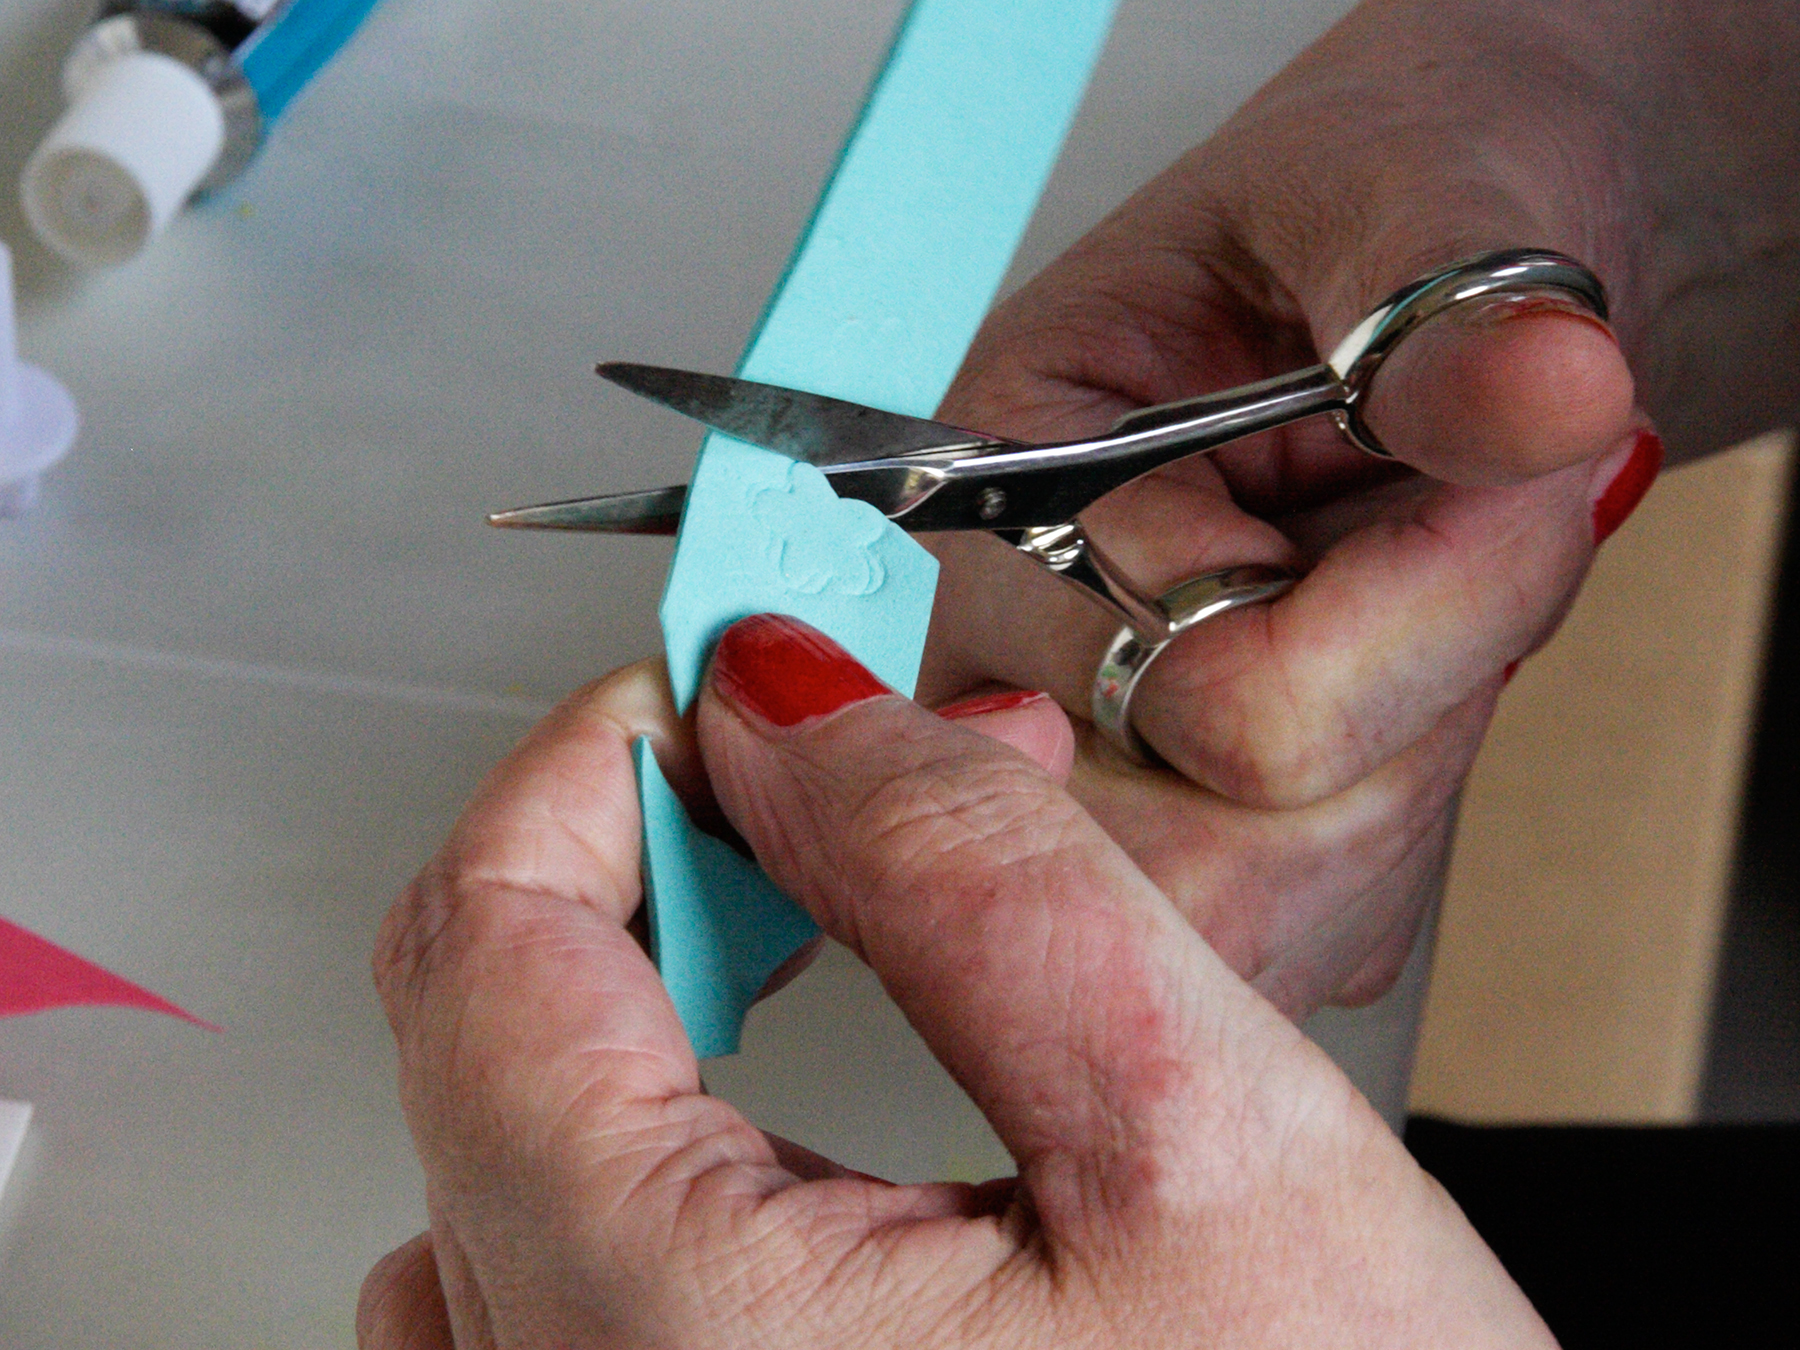

Cut out the flowers.
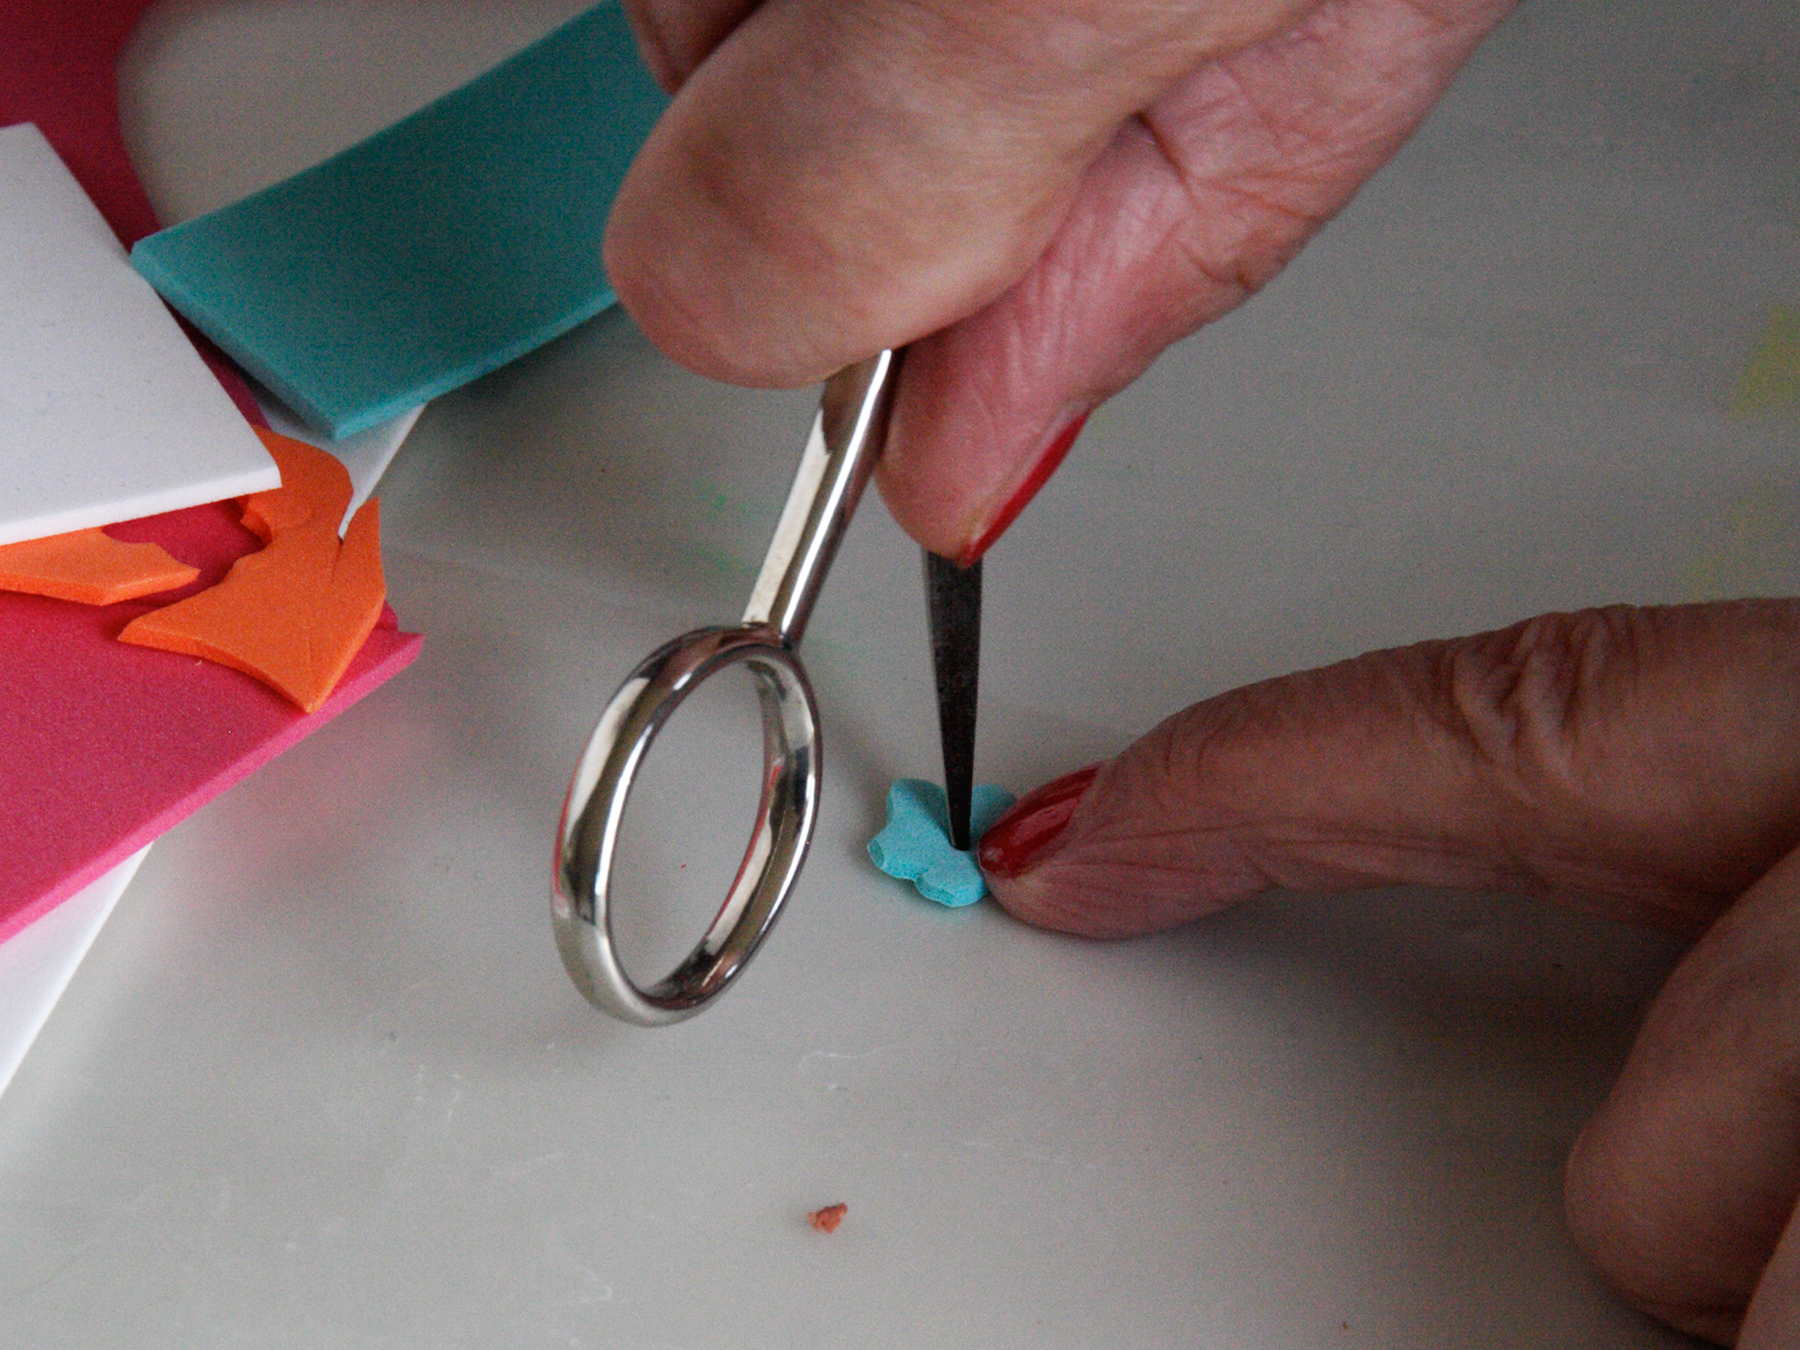
Prick a hole in the centre of the flower.
Squeeze a drop of glue on the flowers.
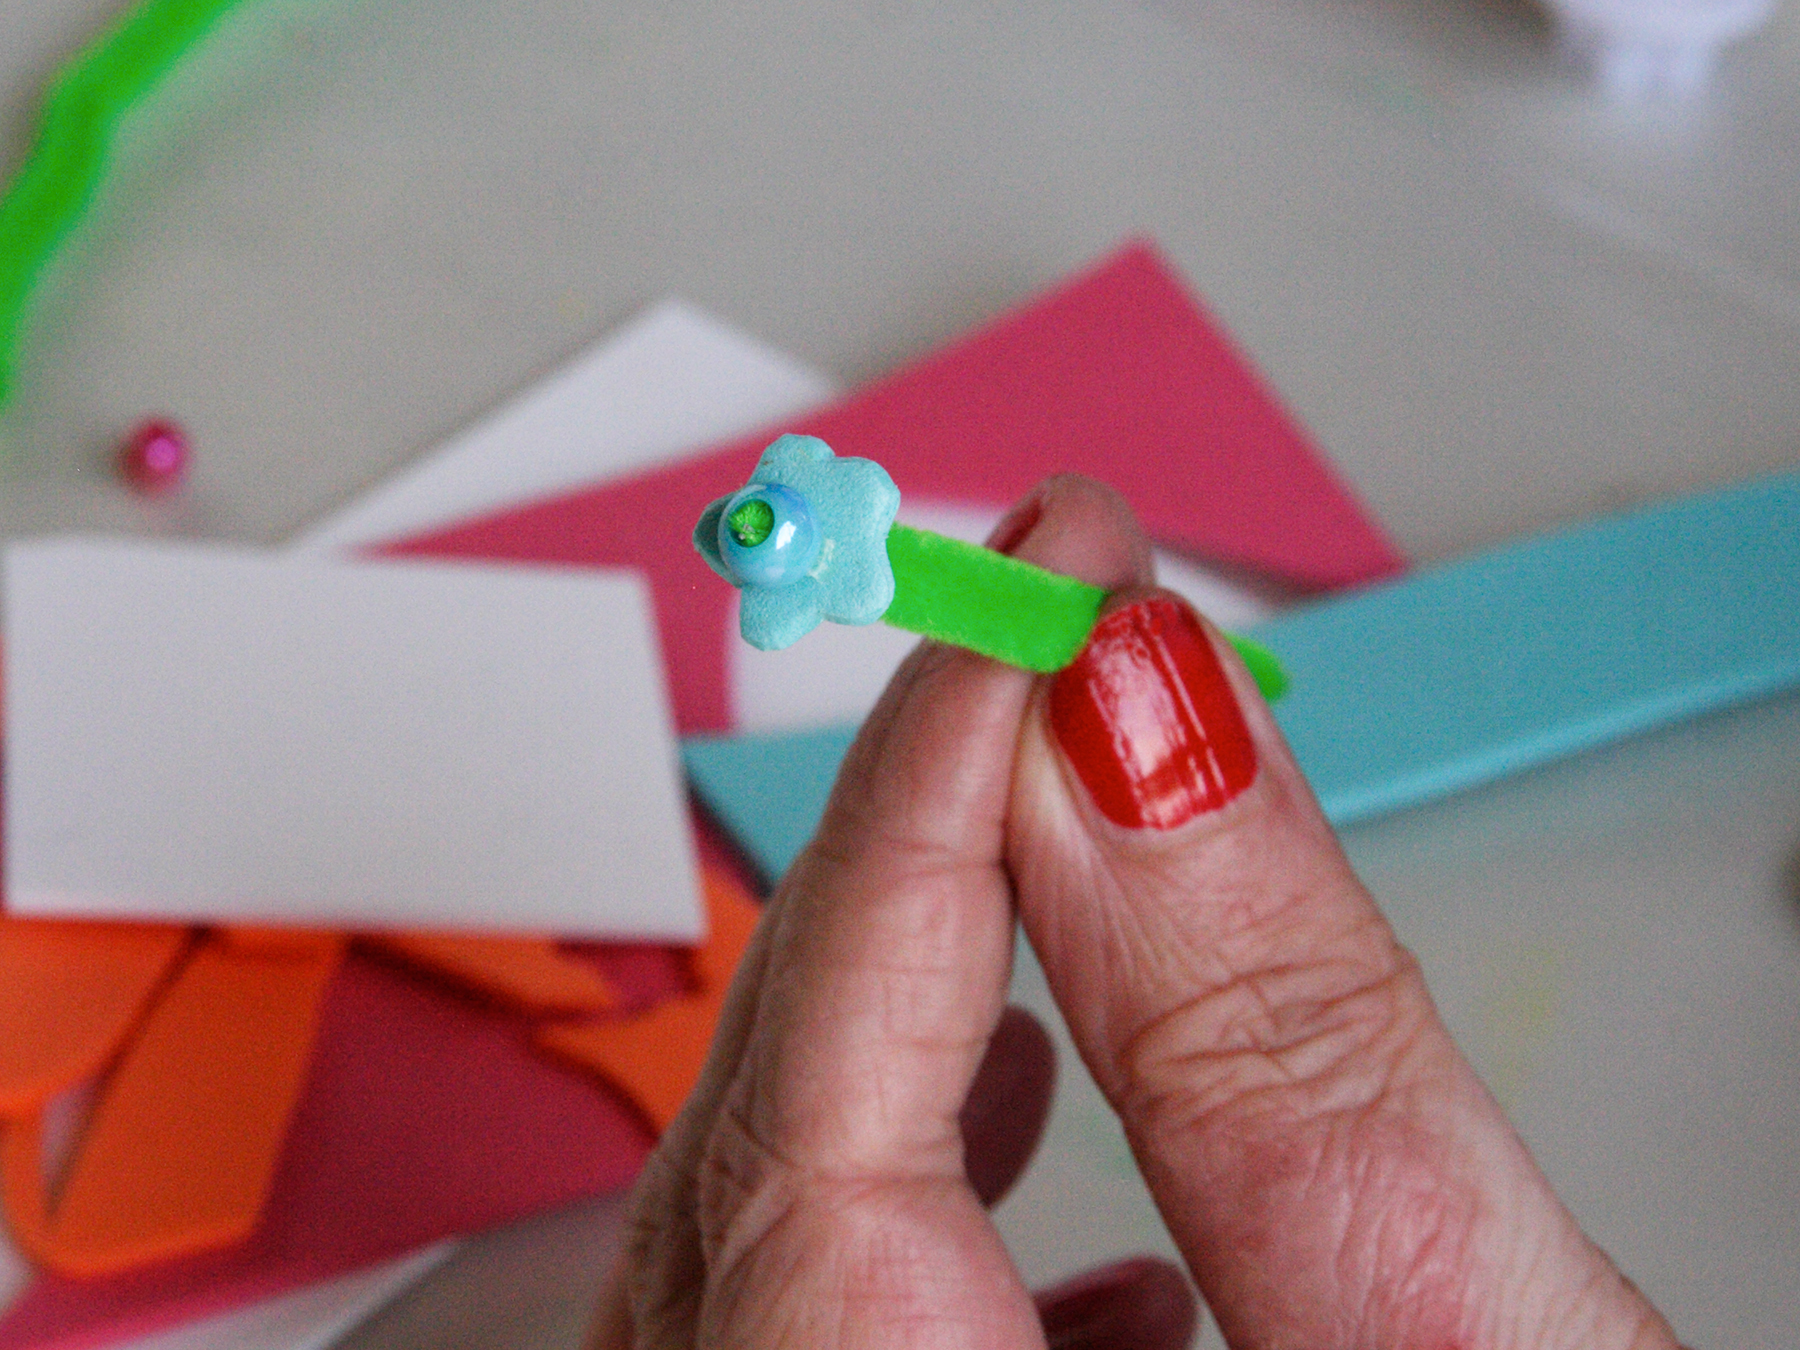
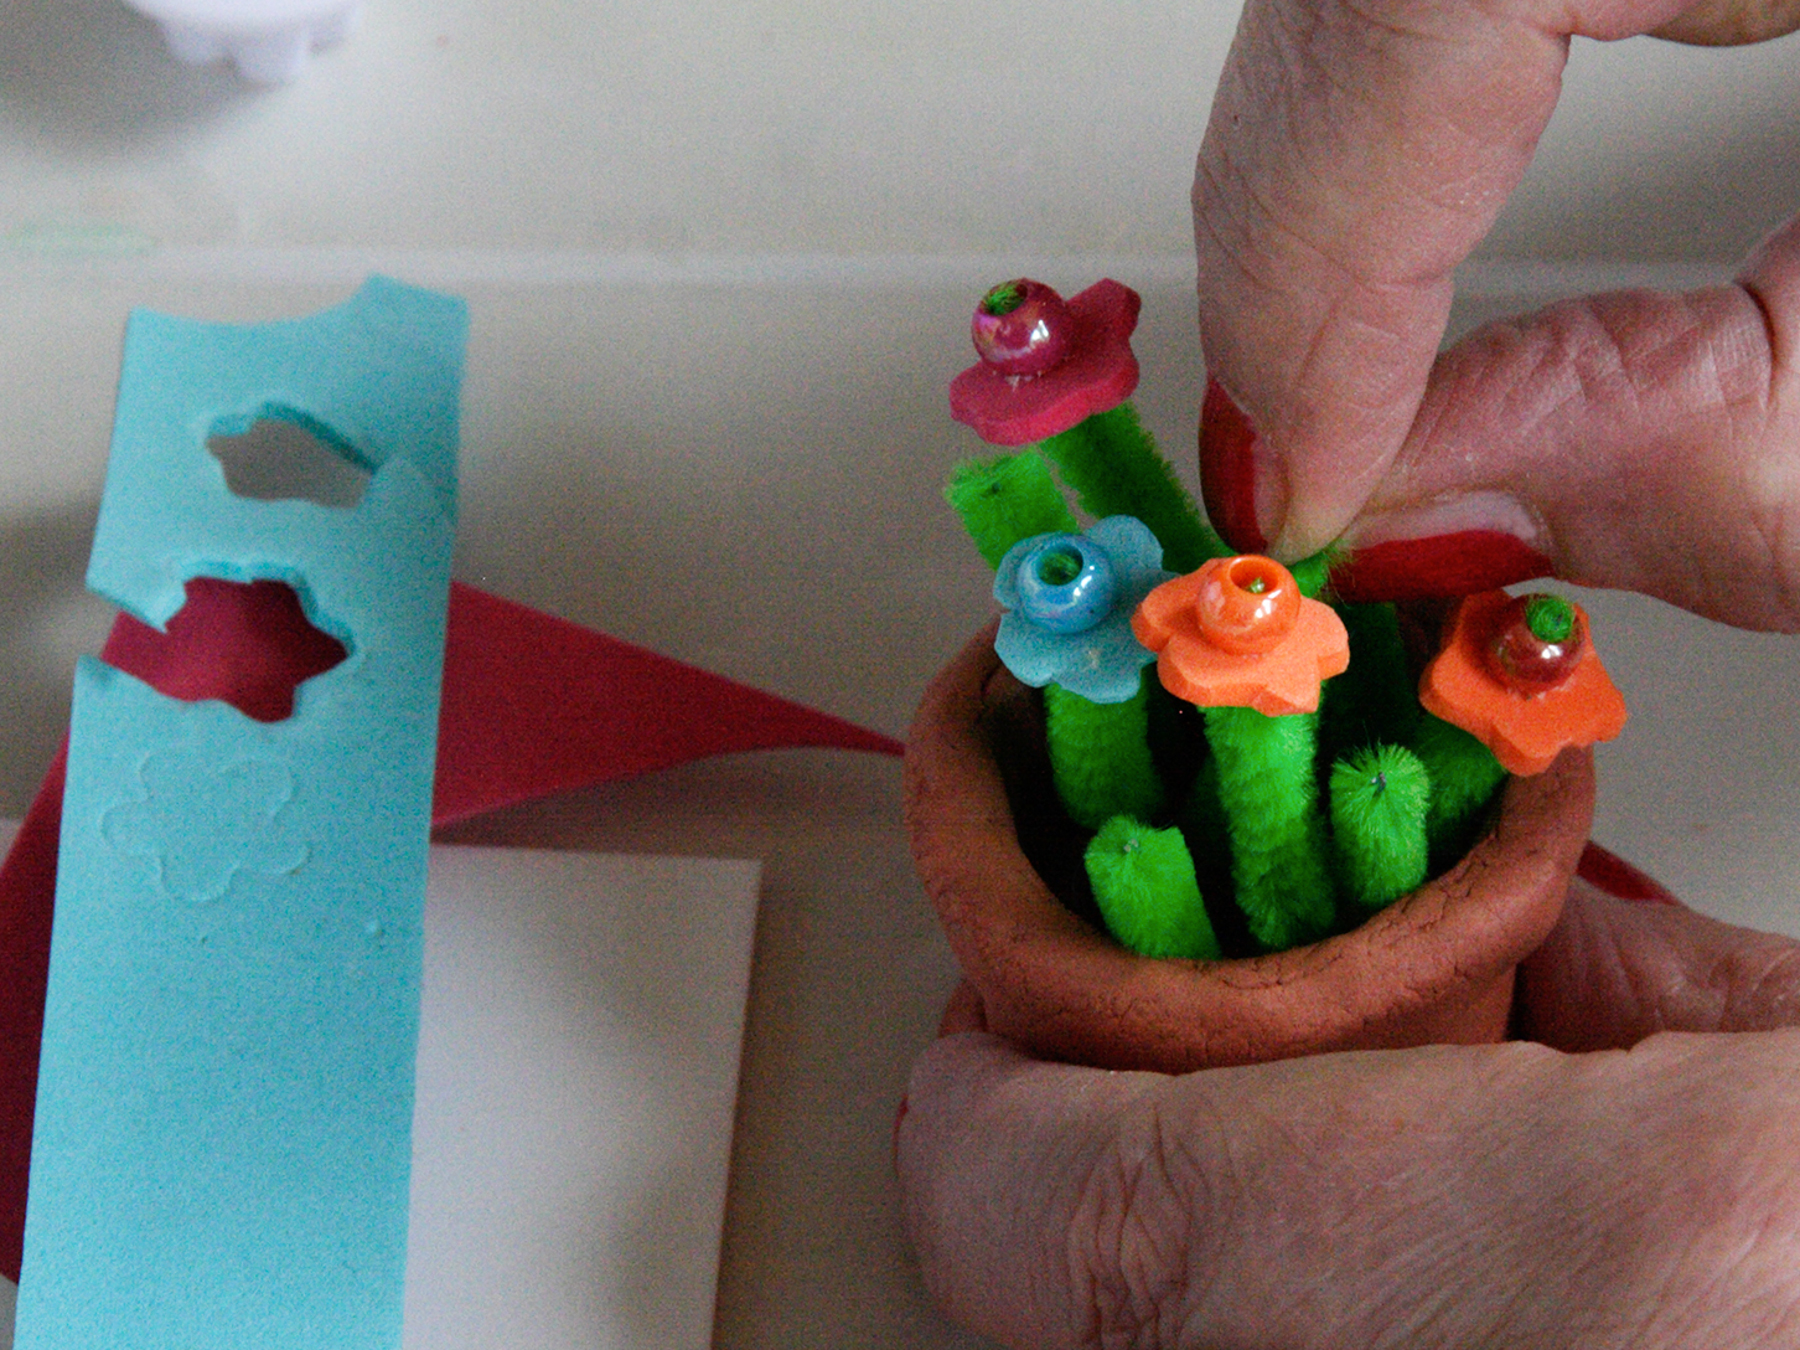
Glue a small bead on top of the flowers.
Stick stems through the flowers.
Stick the flowers into the pot.
Stick in some extra stems.
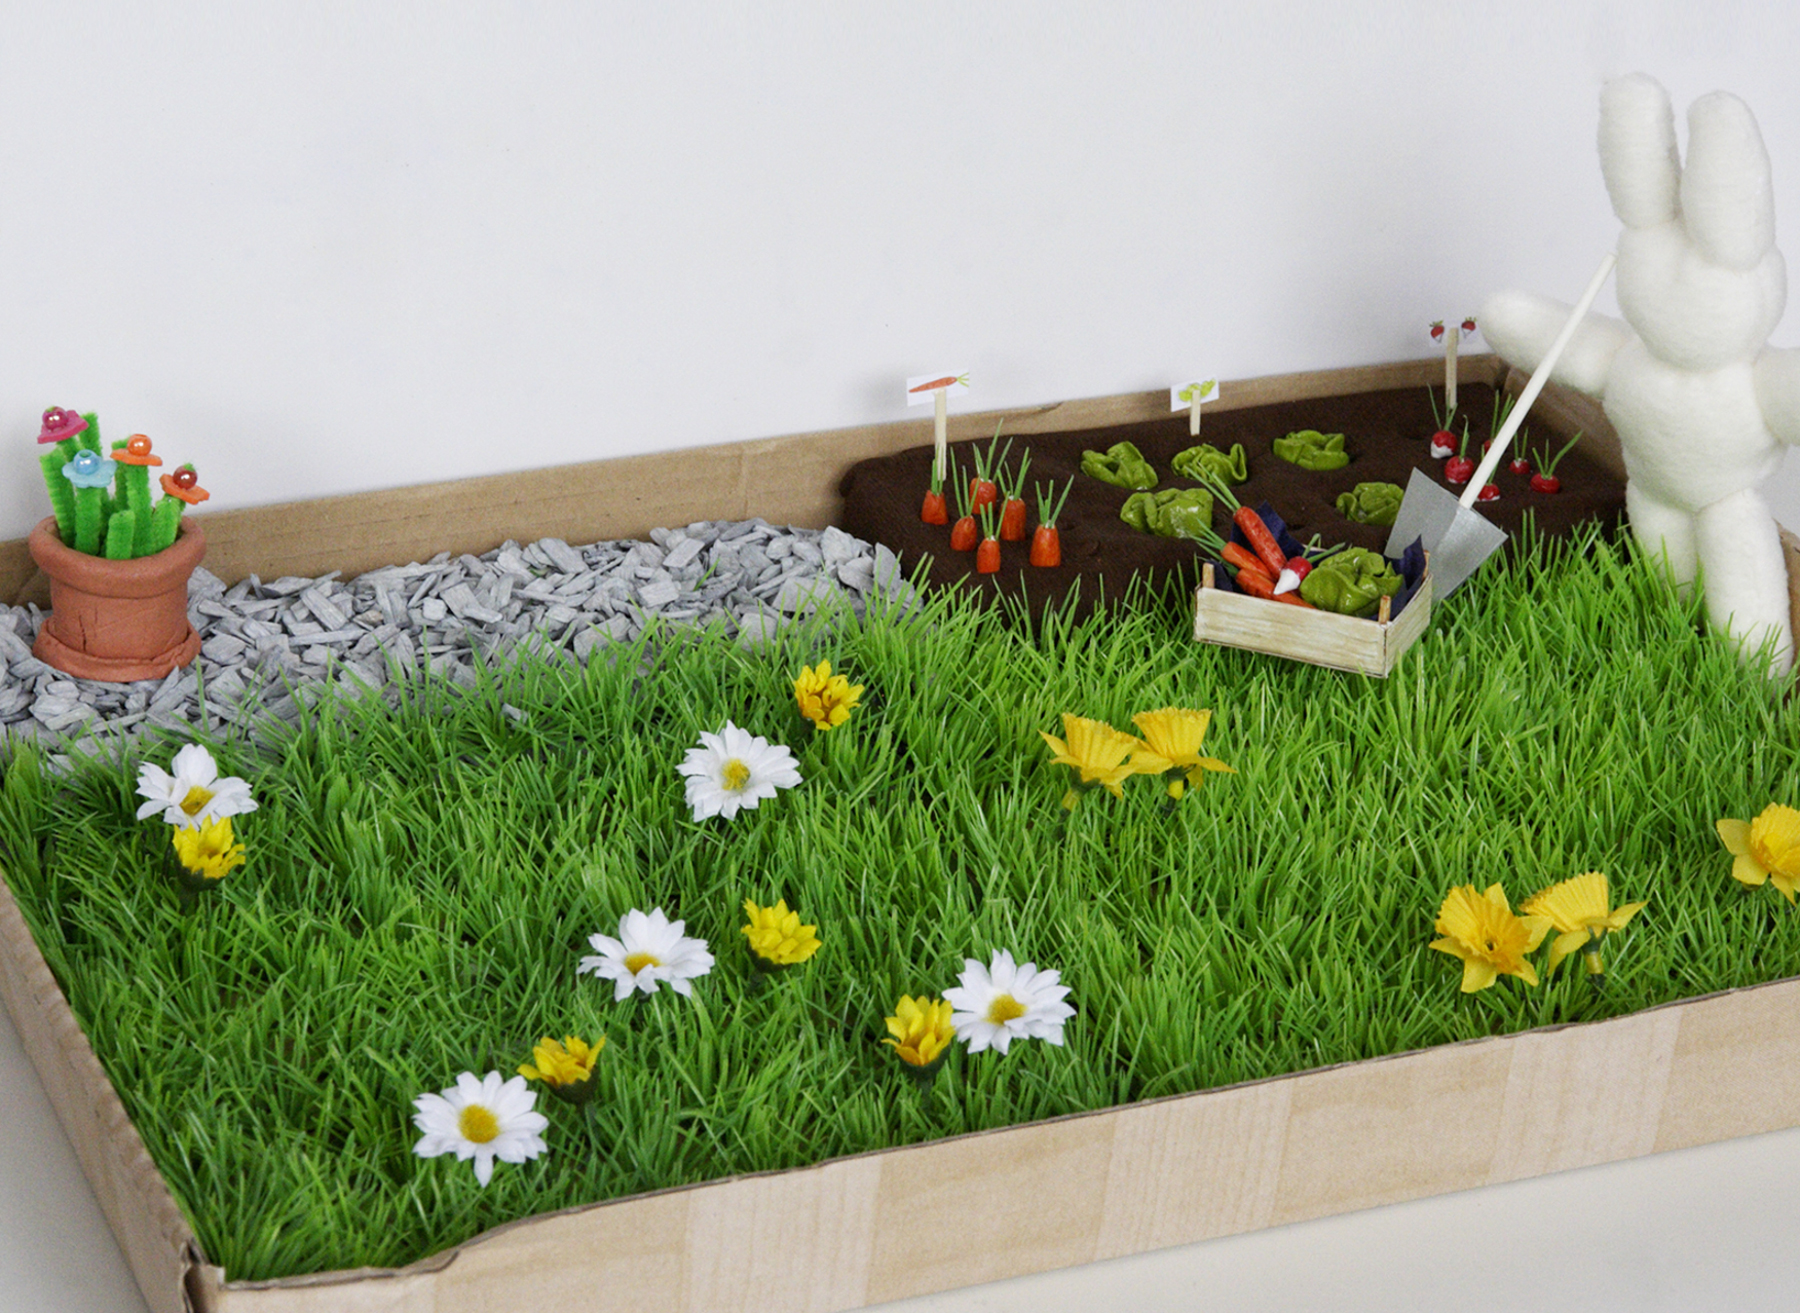
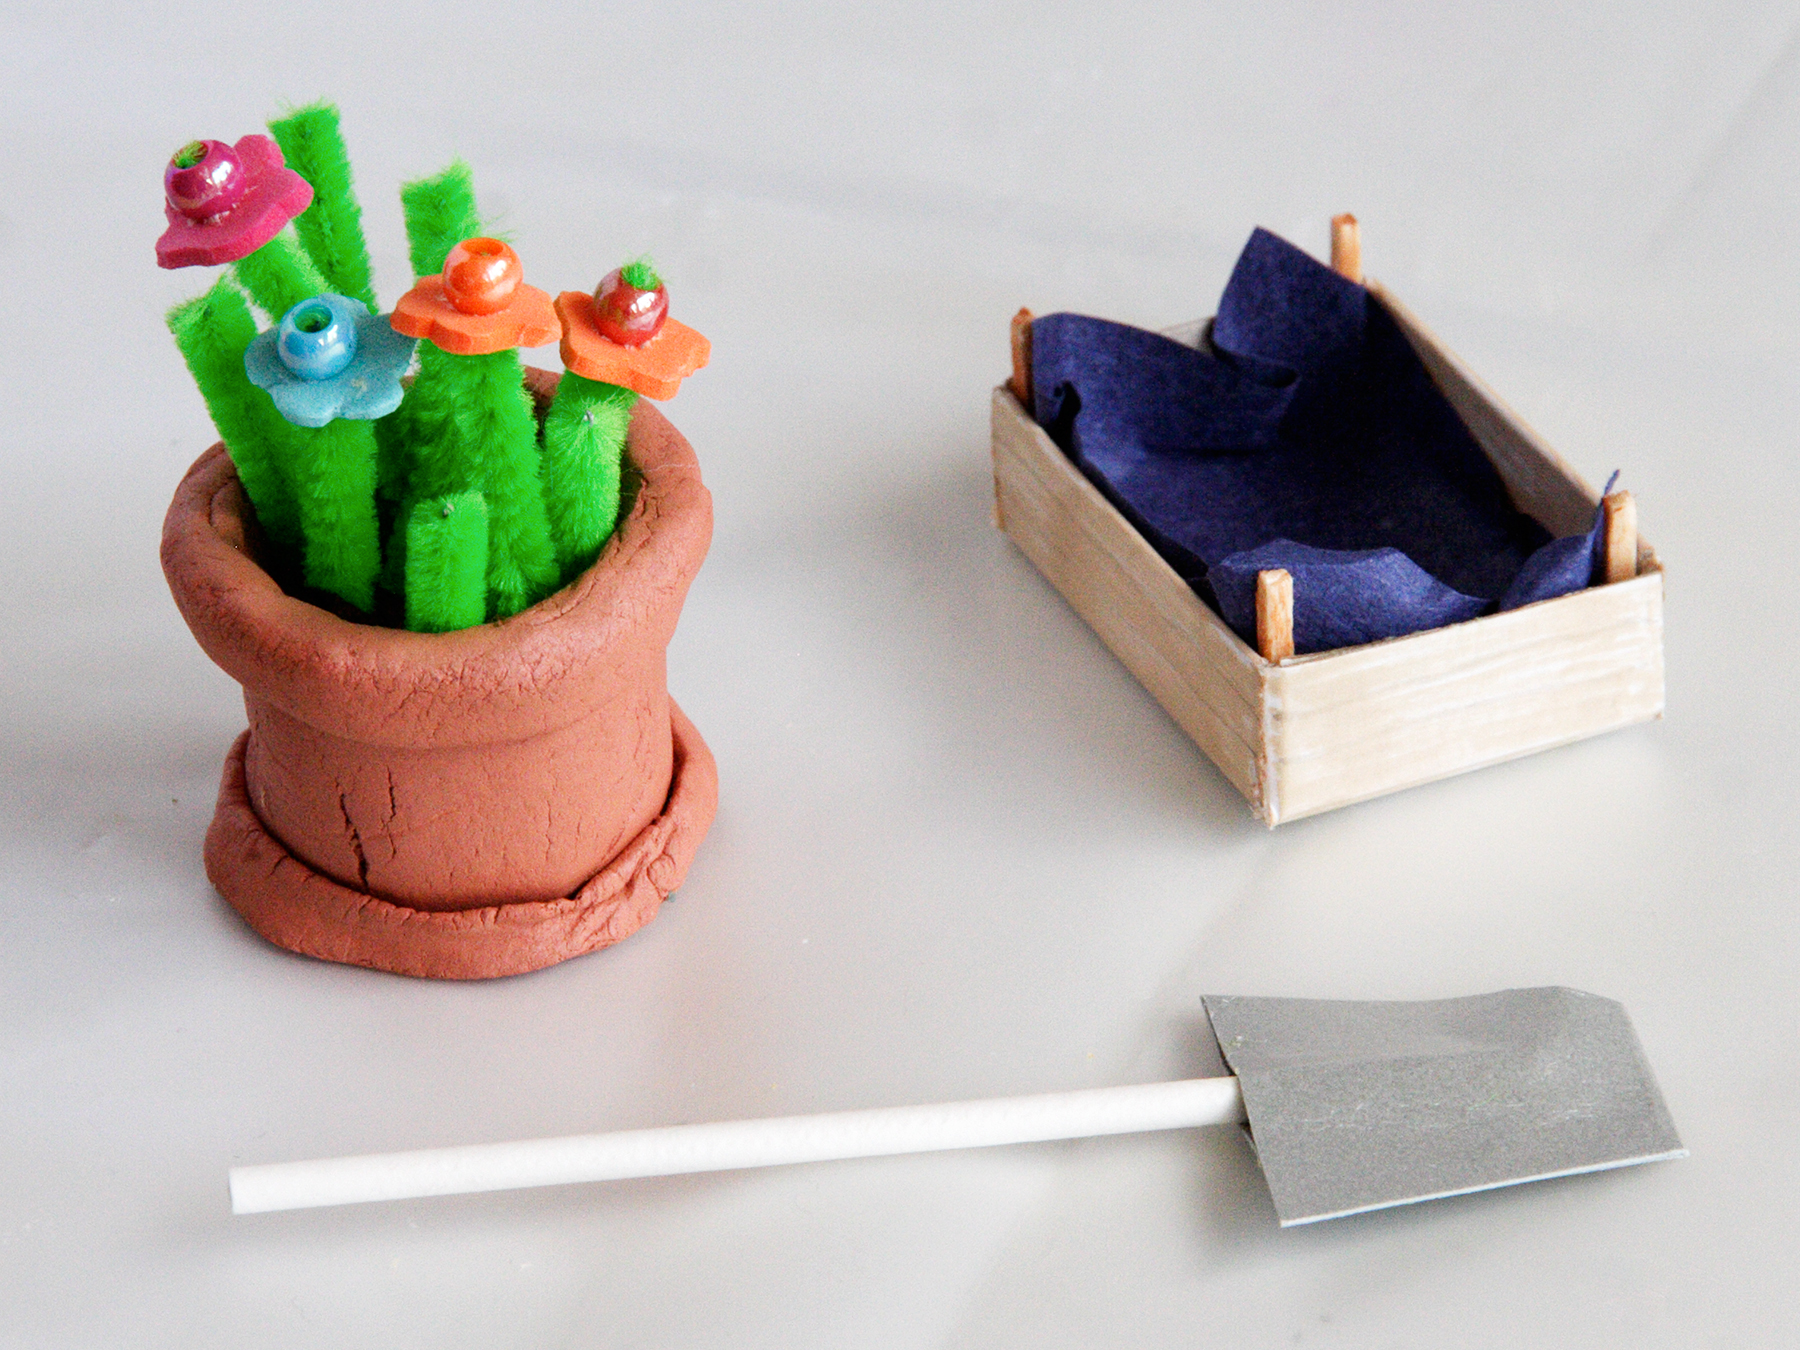
If you like you can also make a spade and/or a box for the cut off flowers out of card board. Or put them in the garden we made last year!