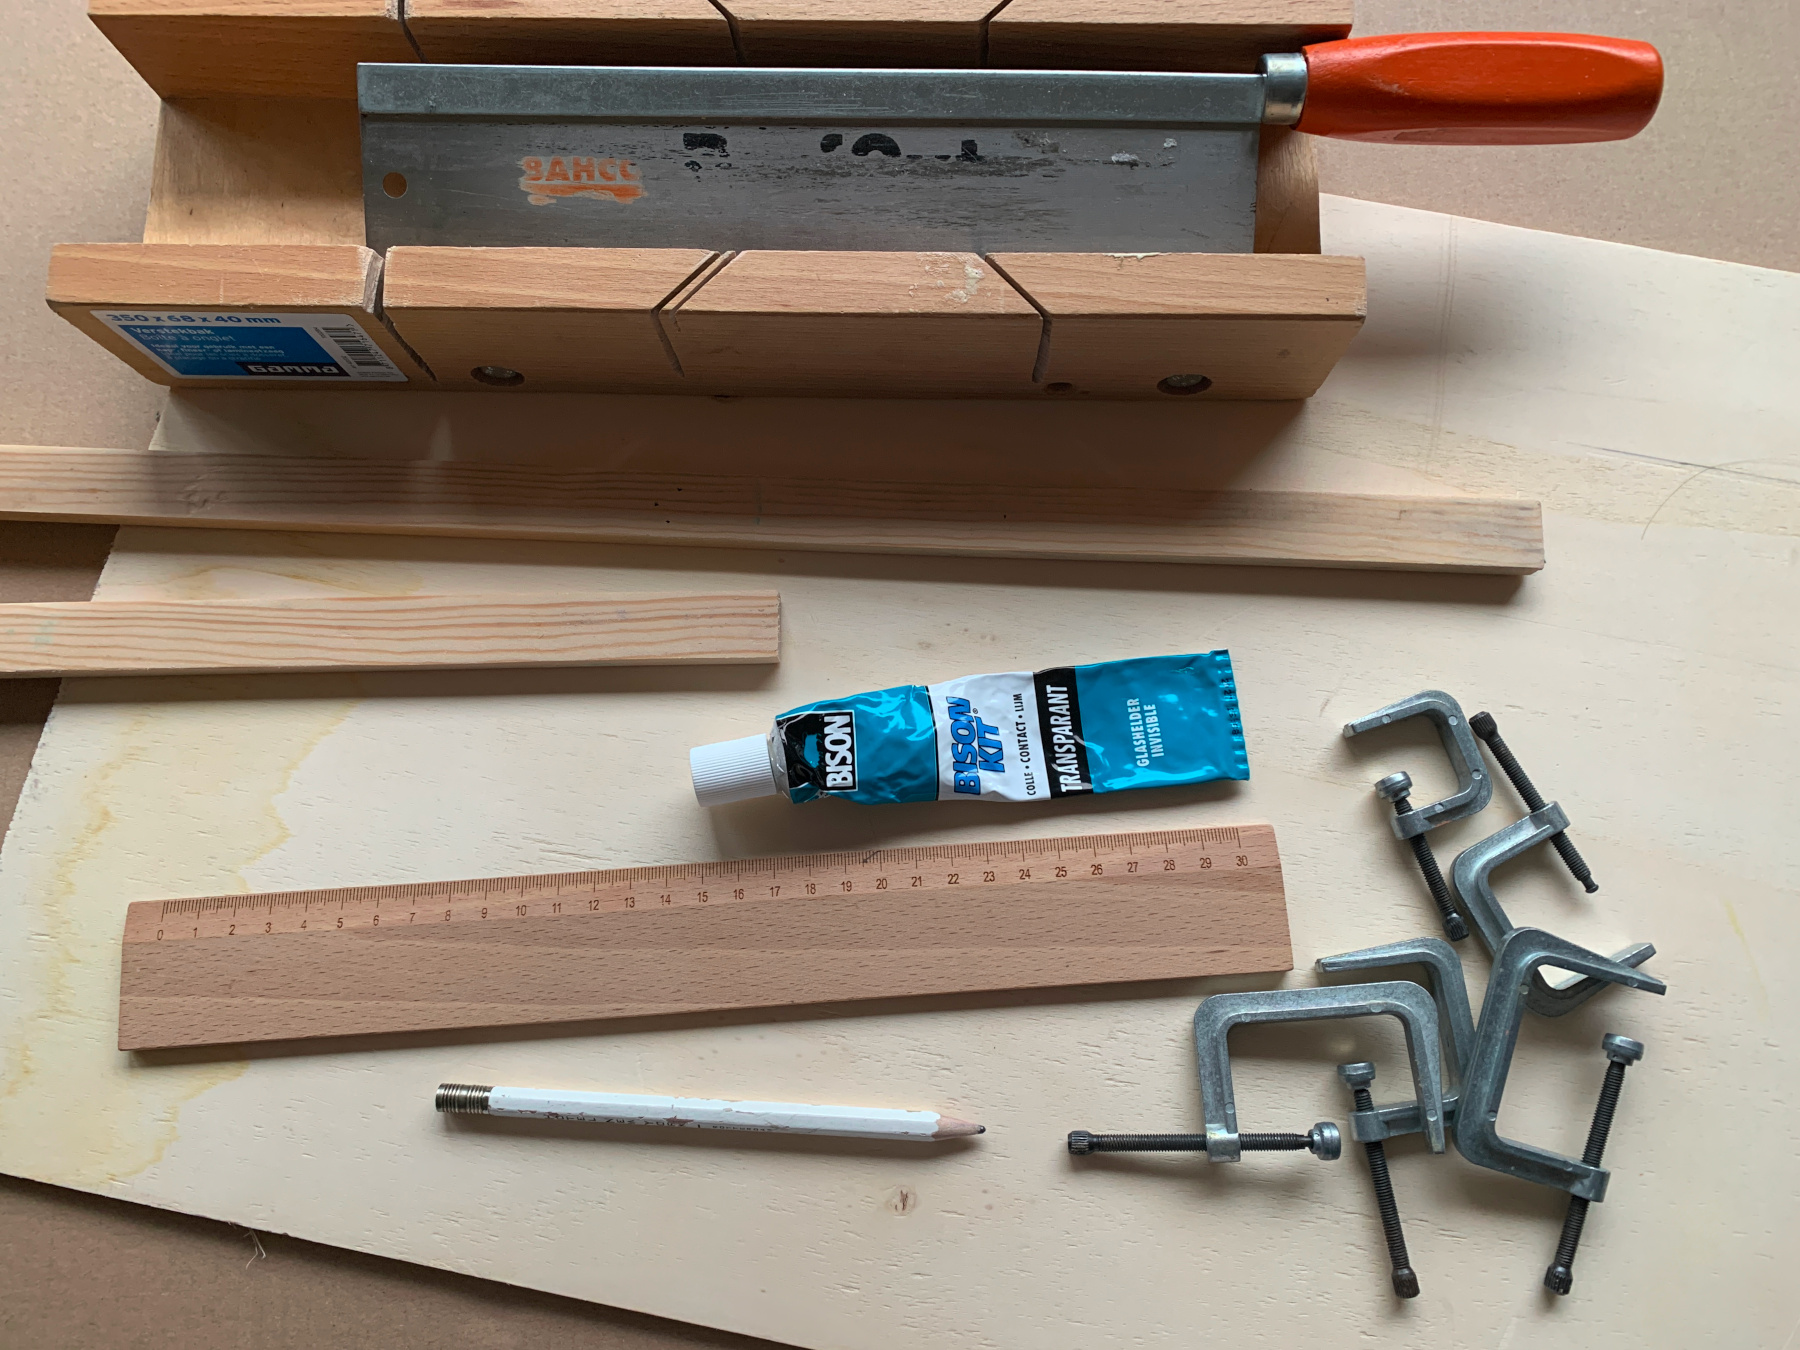
What do you need?
a piece of plywood measuring 20x20cm
a long wooden slat of 20x10mm
a miter box and a saw
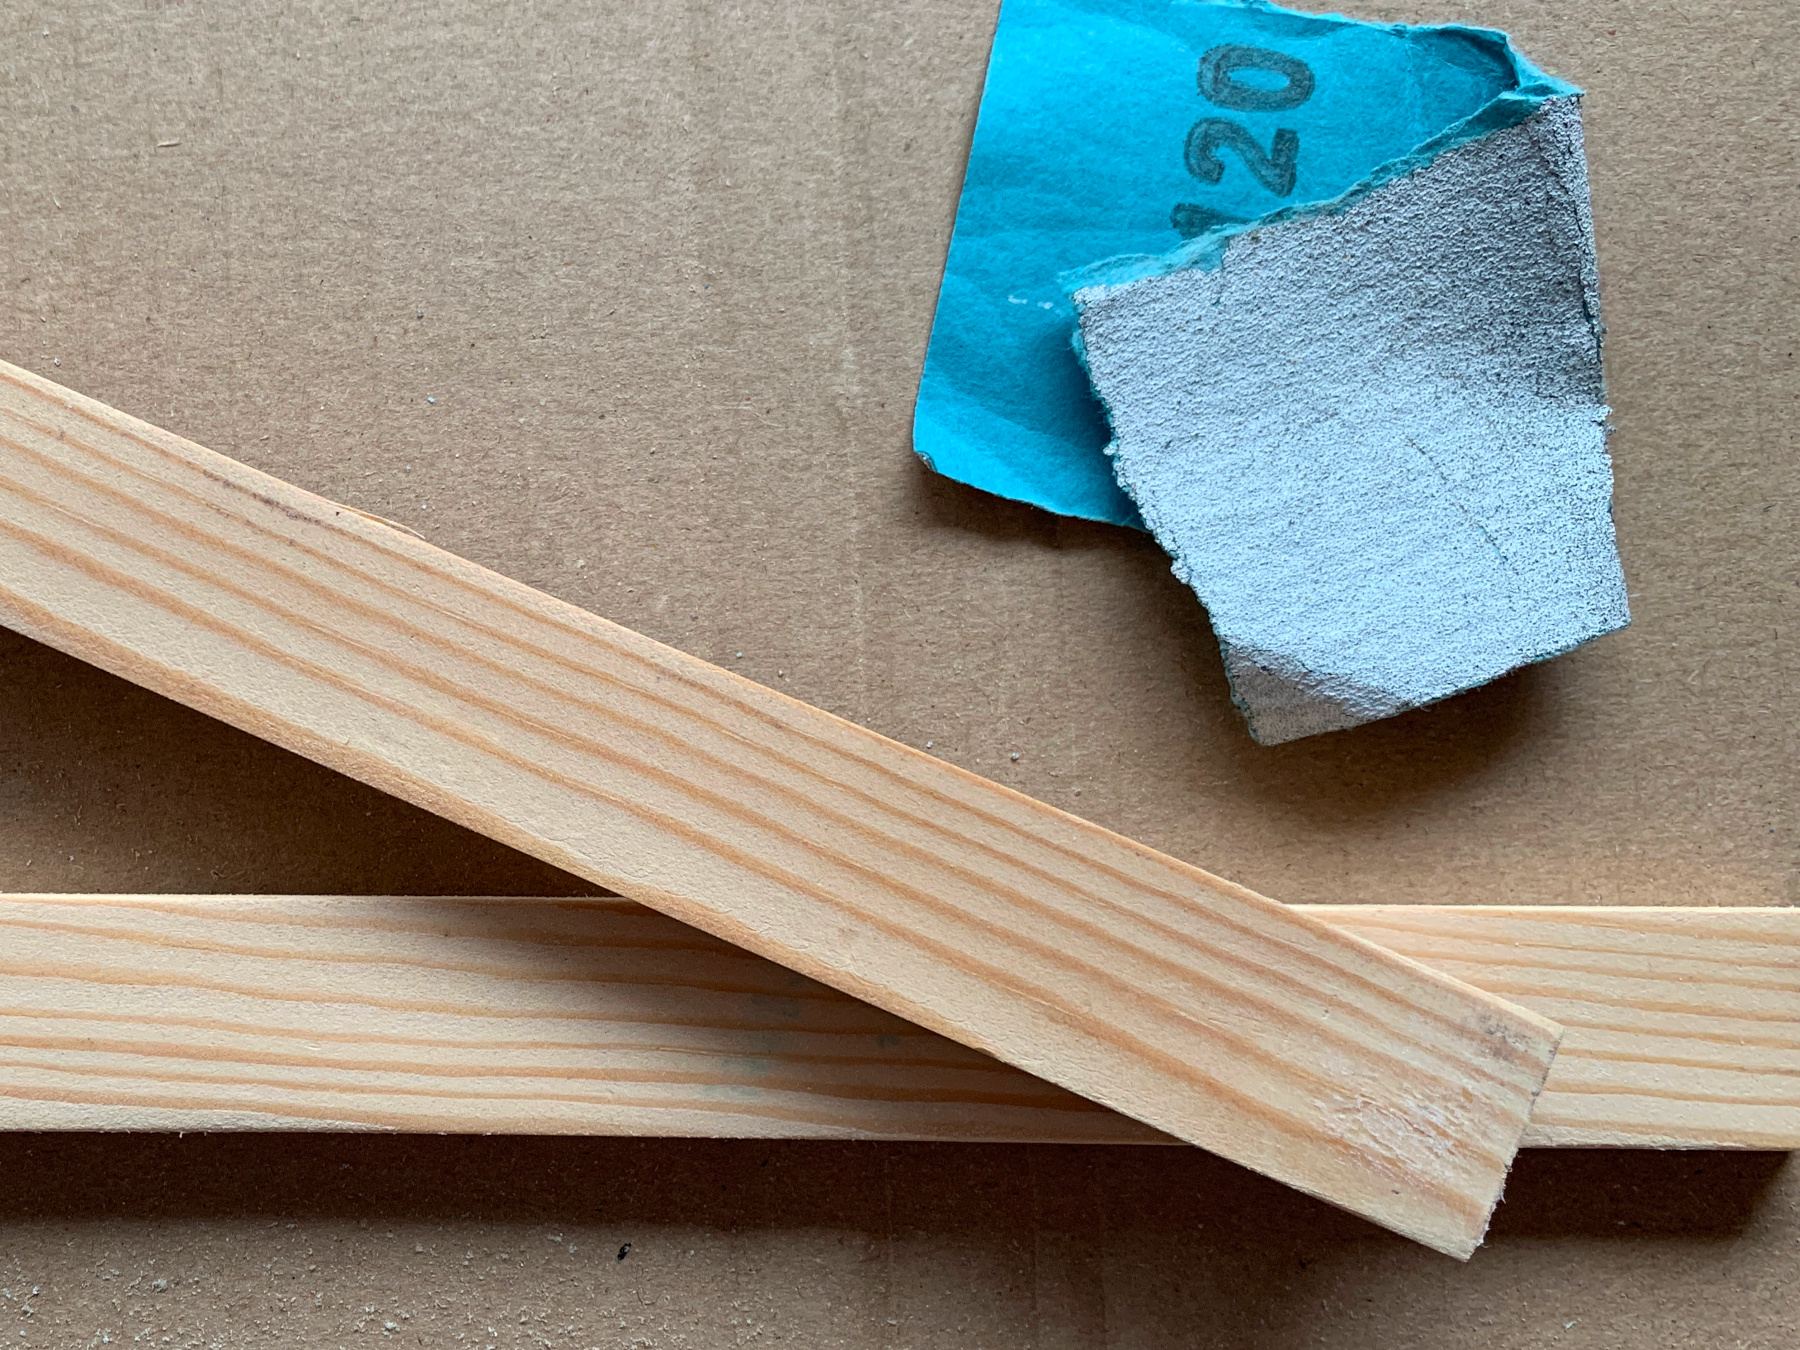
sandpaper
Bison glue
glue clamps
Optional:
colorless, matte varnish
a paintbrush
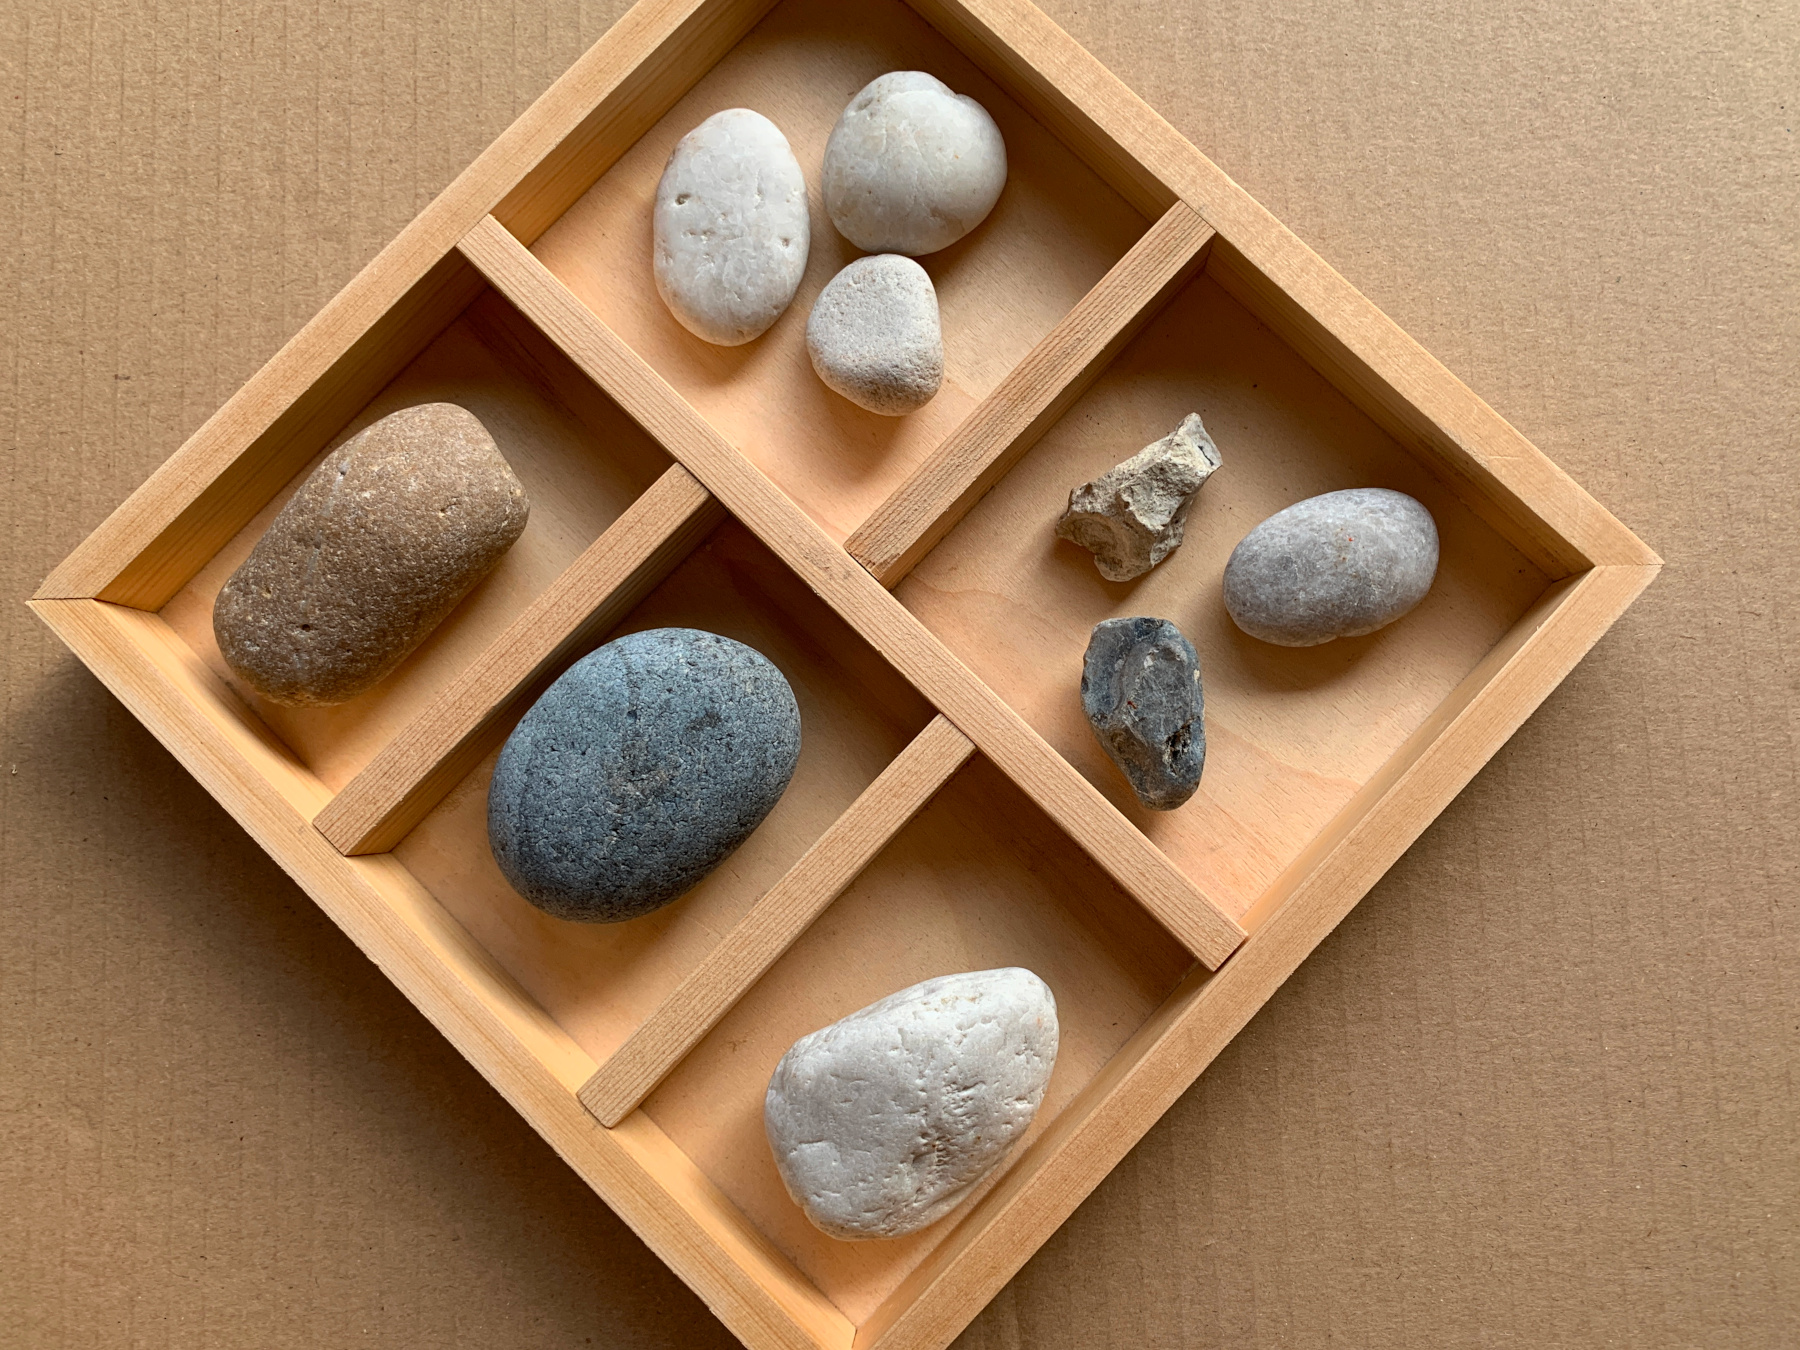
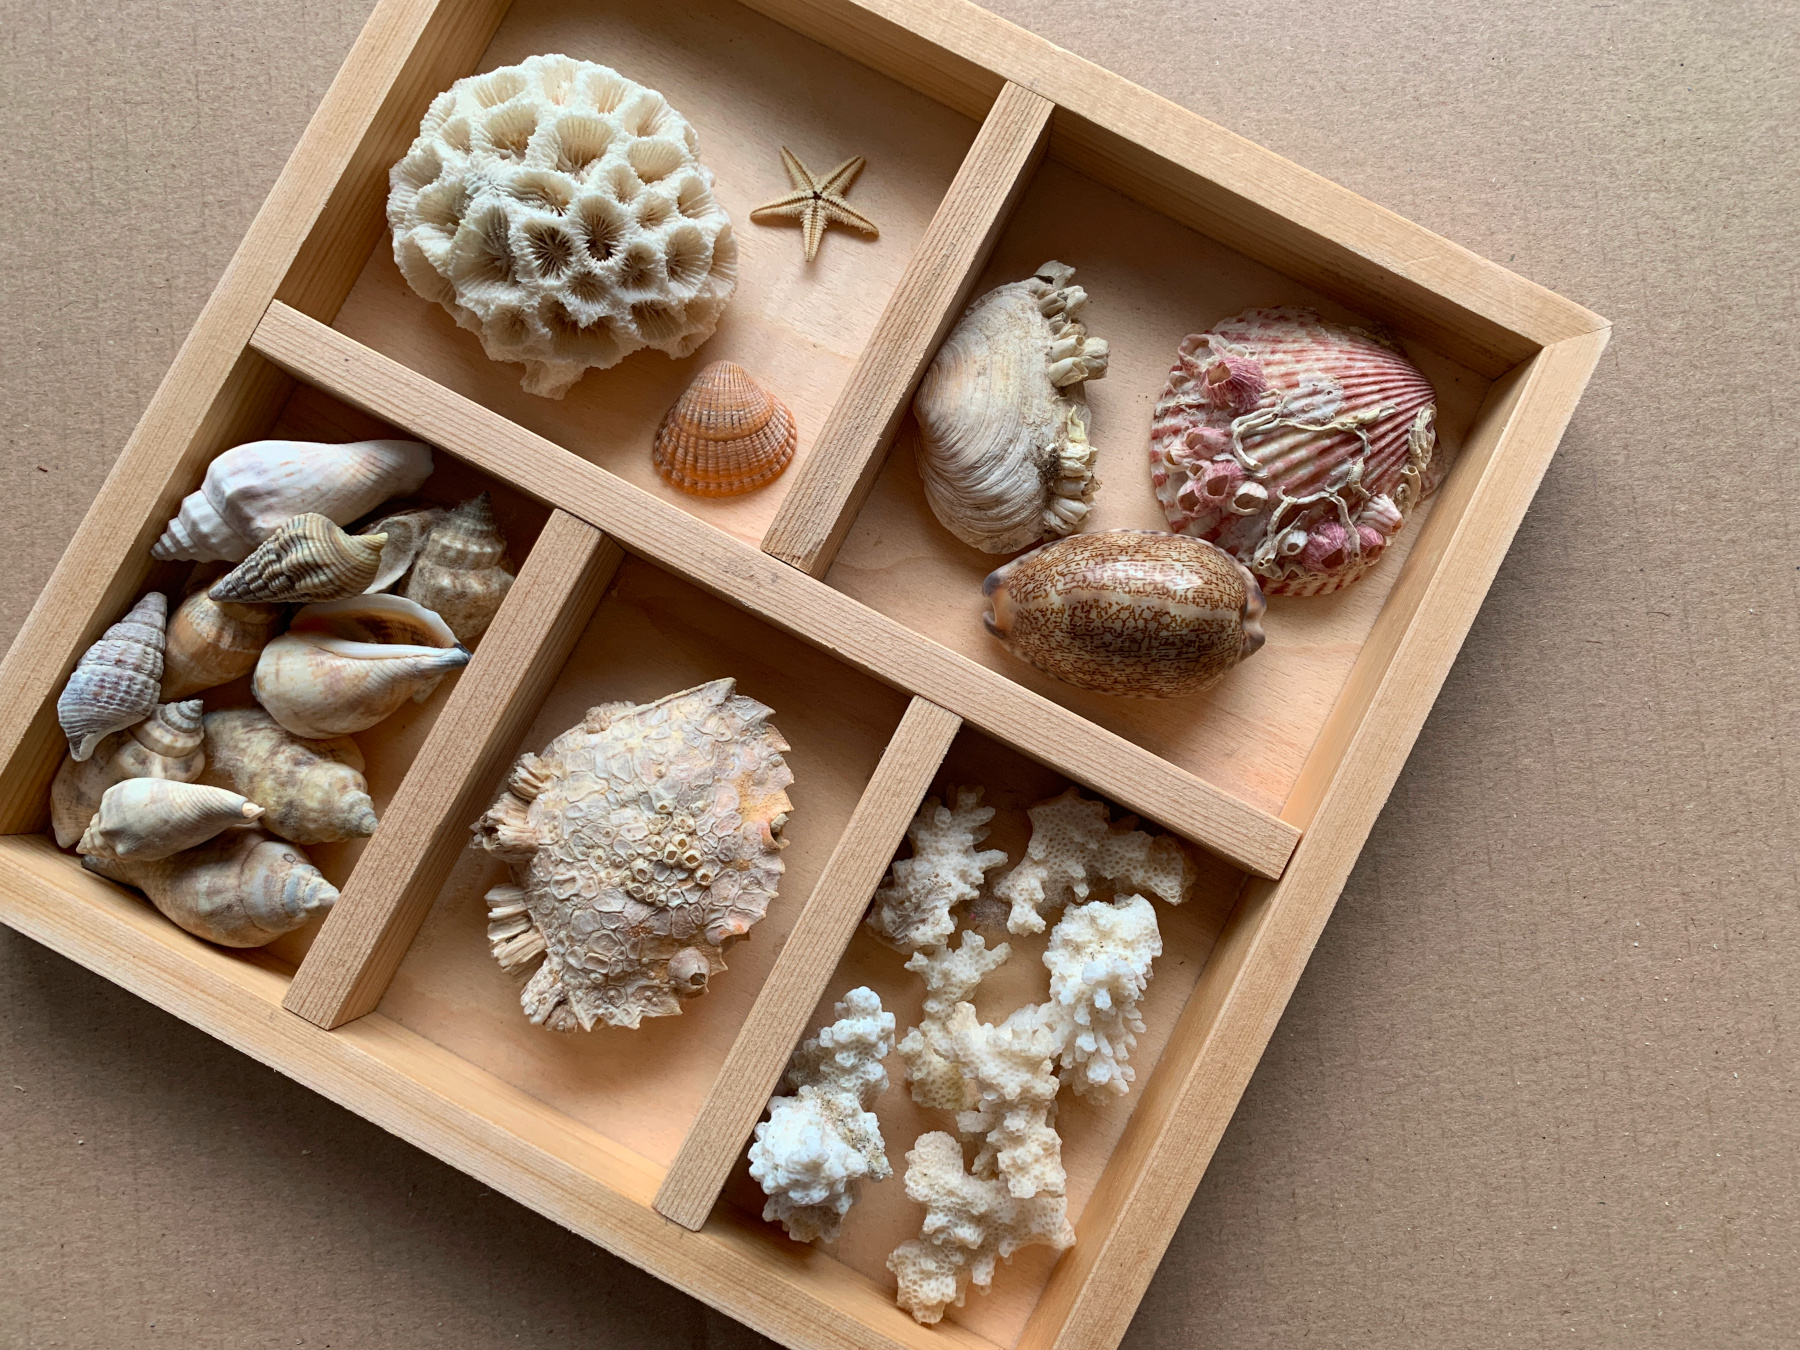
Now that the first trays are already filled with toys, we are making a few more for the little monsters' collections. Not only can you use the sorting trays for neatly tidying up or to sort out your collection, you can beautifully display your collection in these trays!
How to make yet another sorting tray
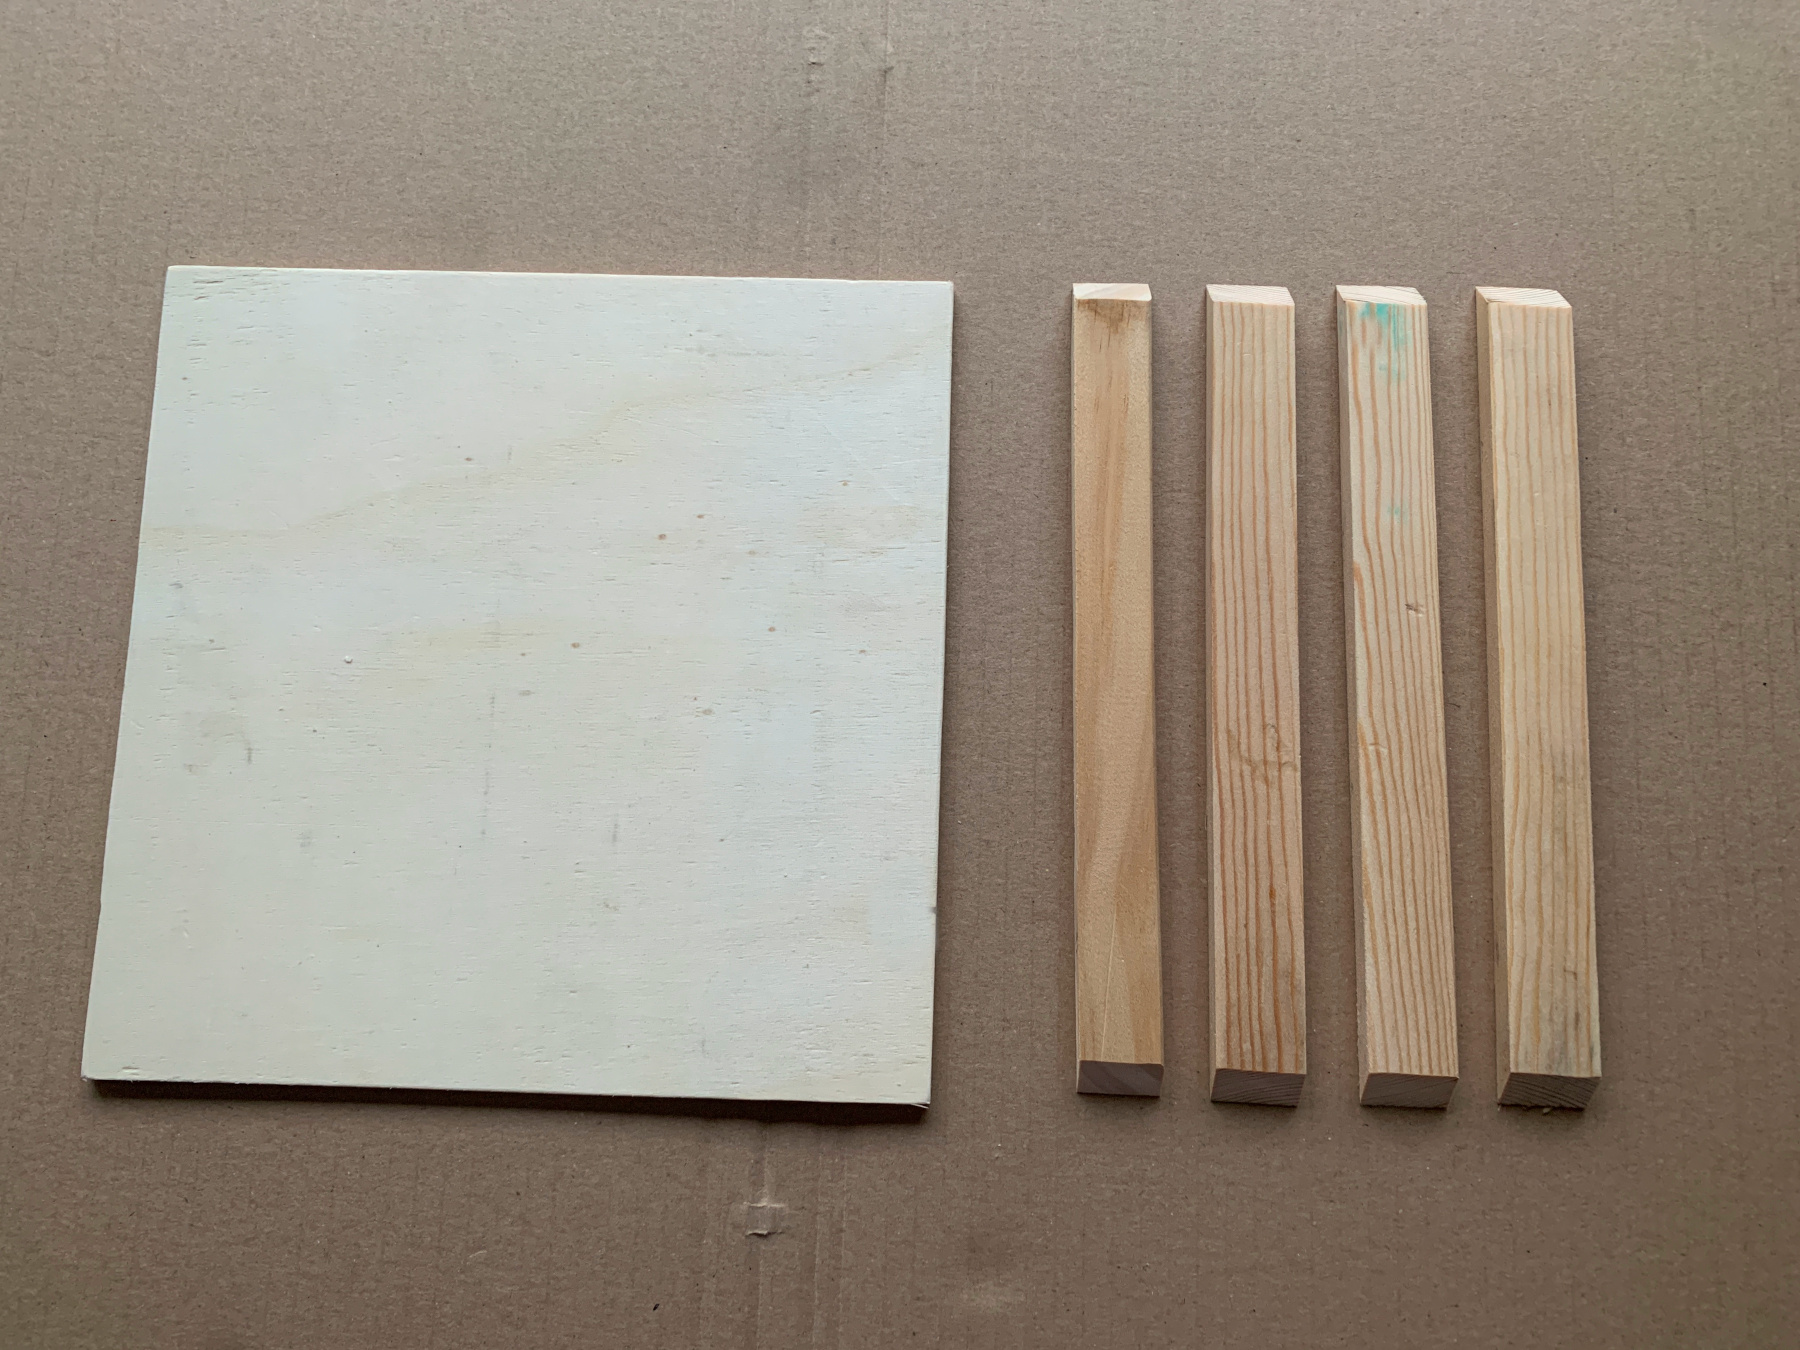
Every tray starts this way, with a bottom of 20x20cm.
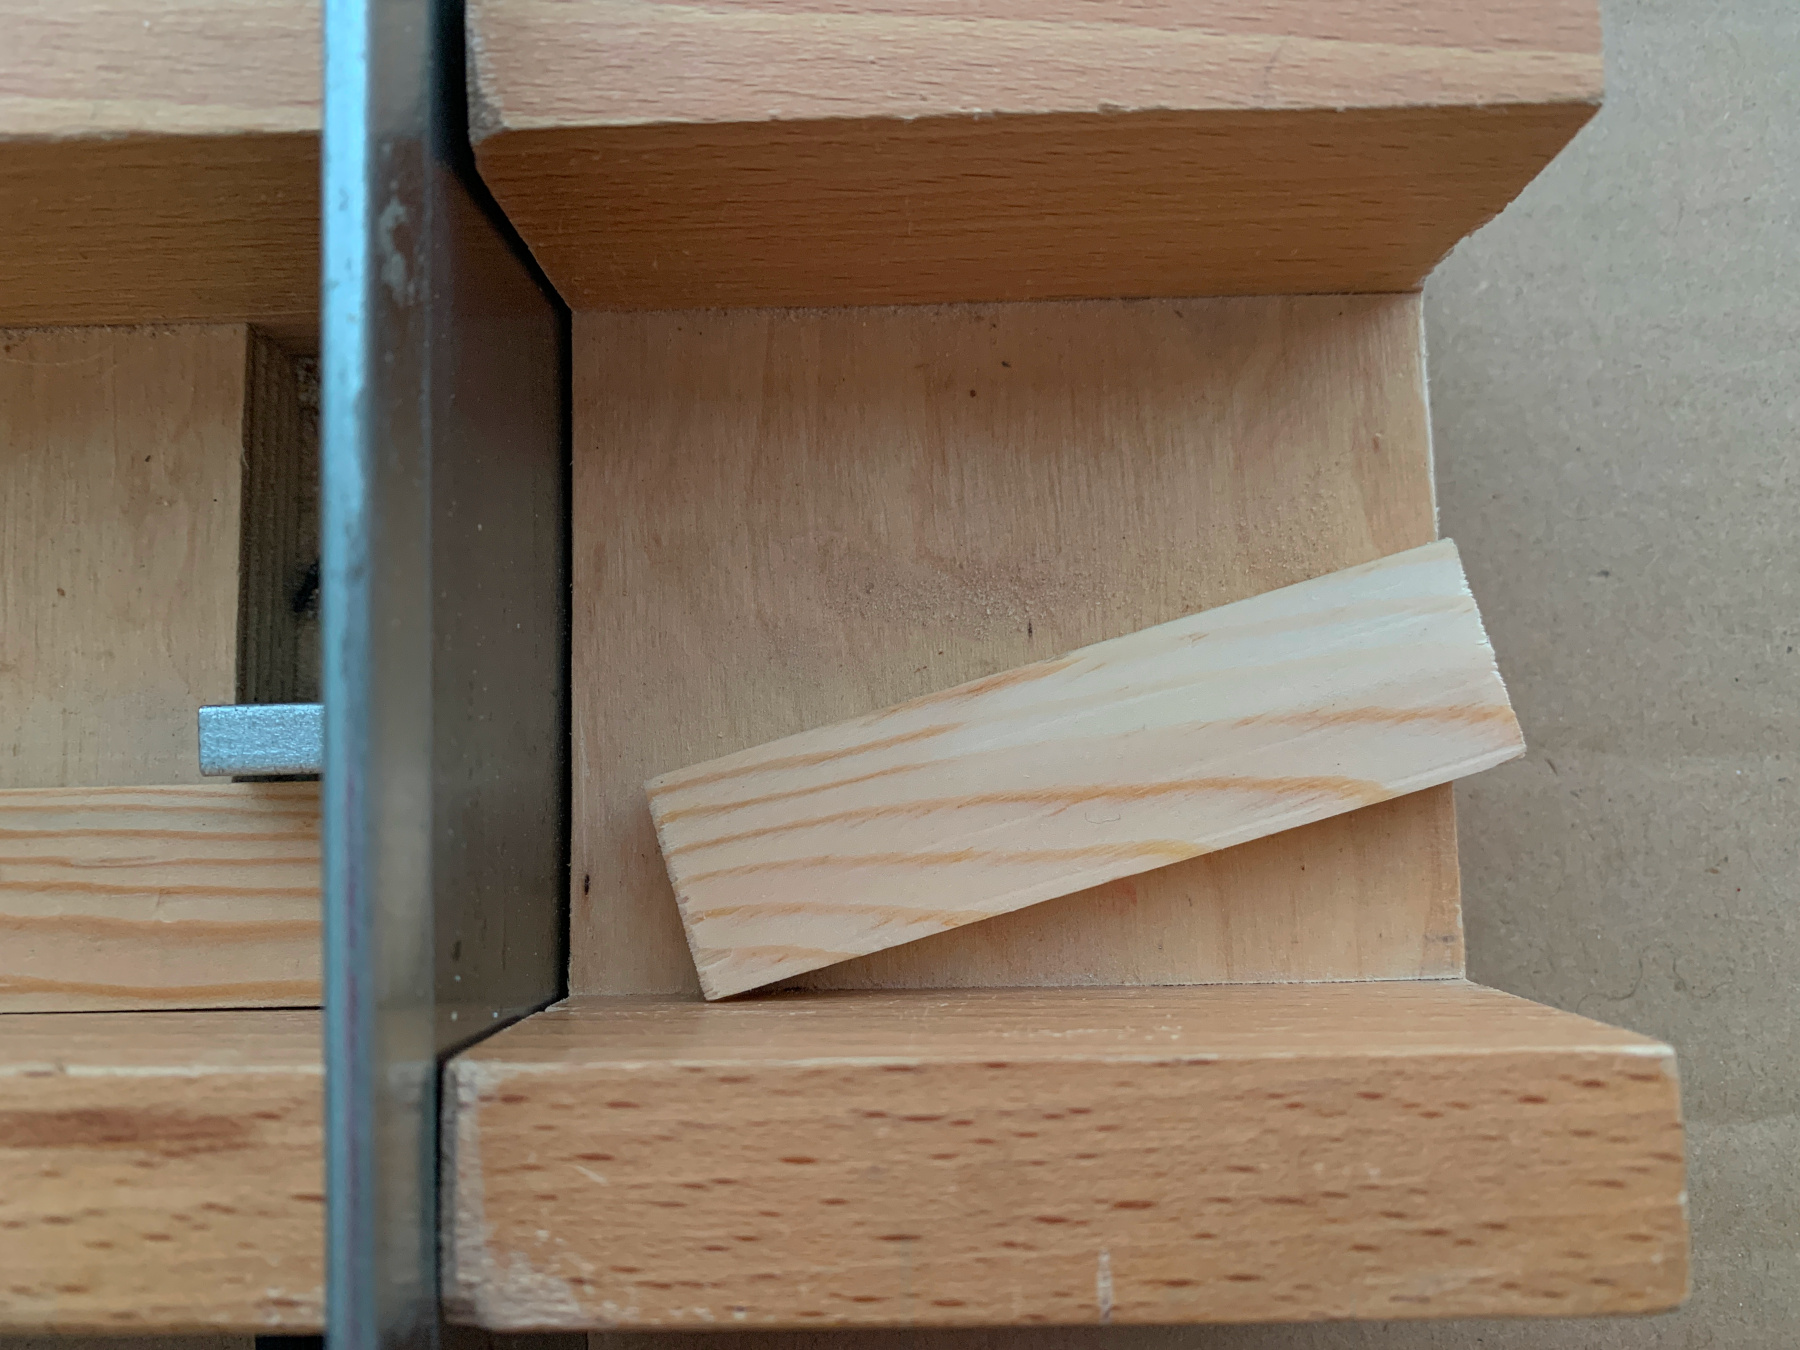
On which you stick 4 mitered slats of 20 cm.
Now saw of 3 slats, each 9cm long, straight across.
Also saw a same slat but then 18 centimeters long.
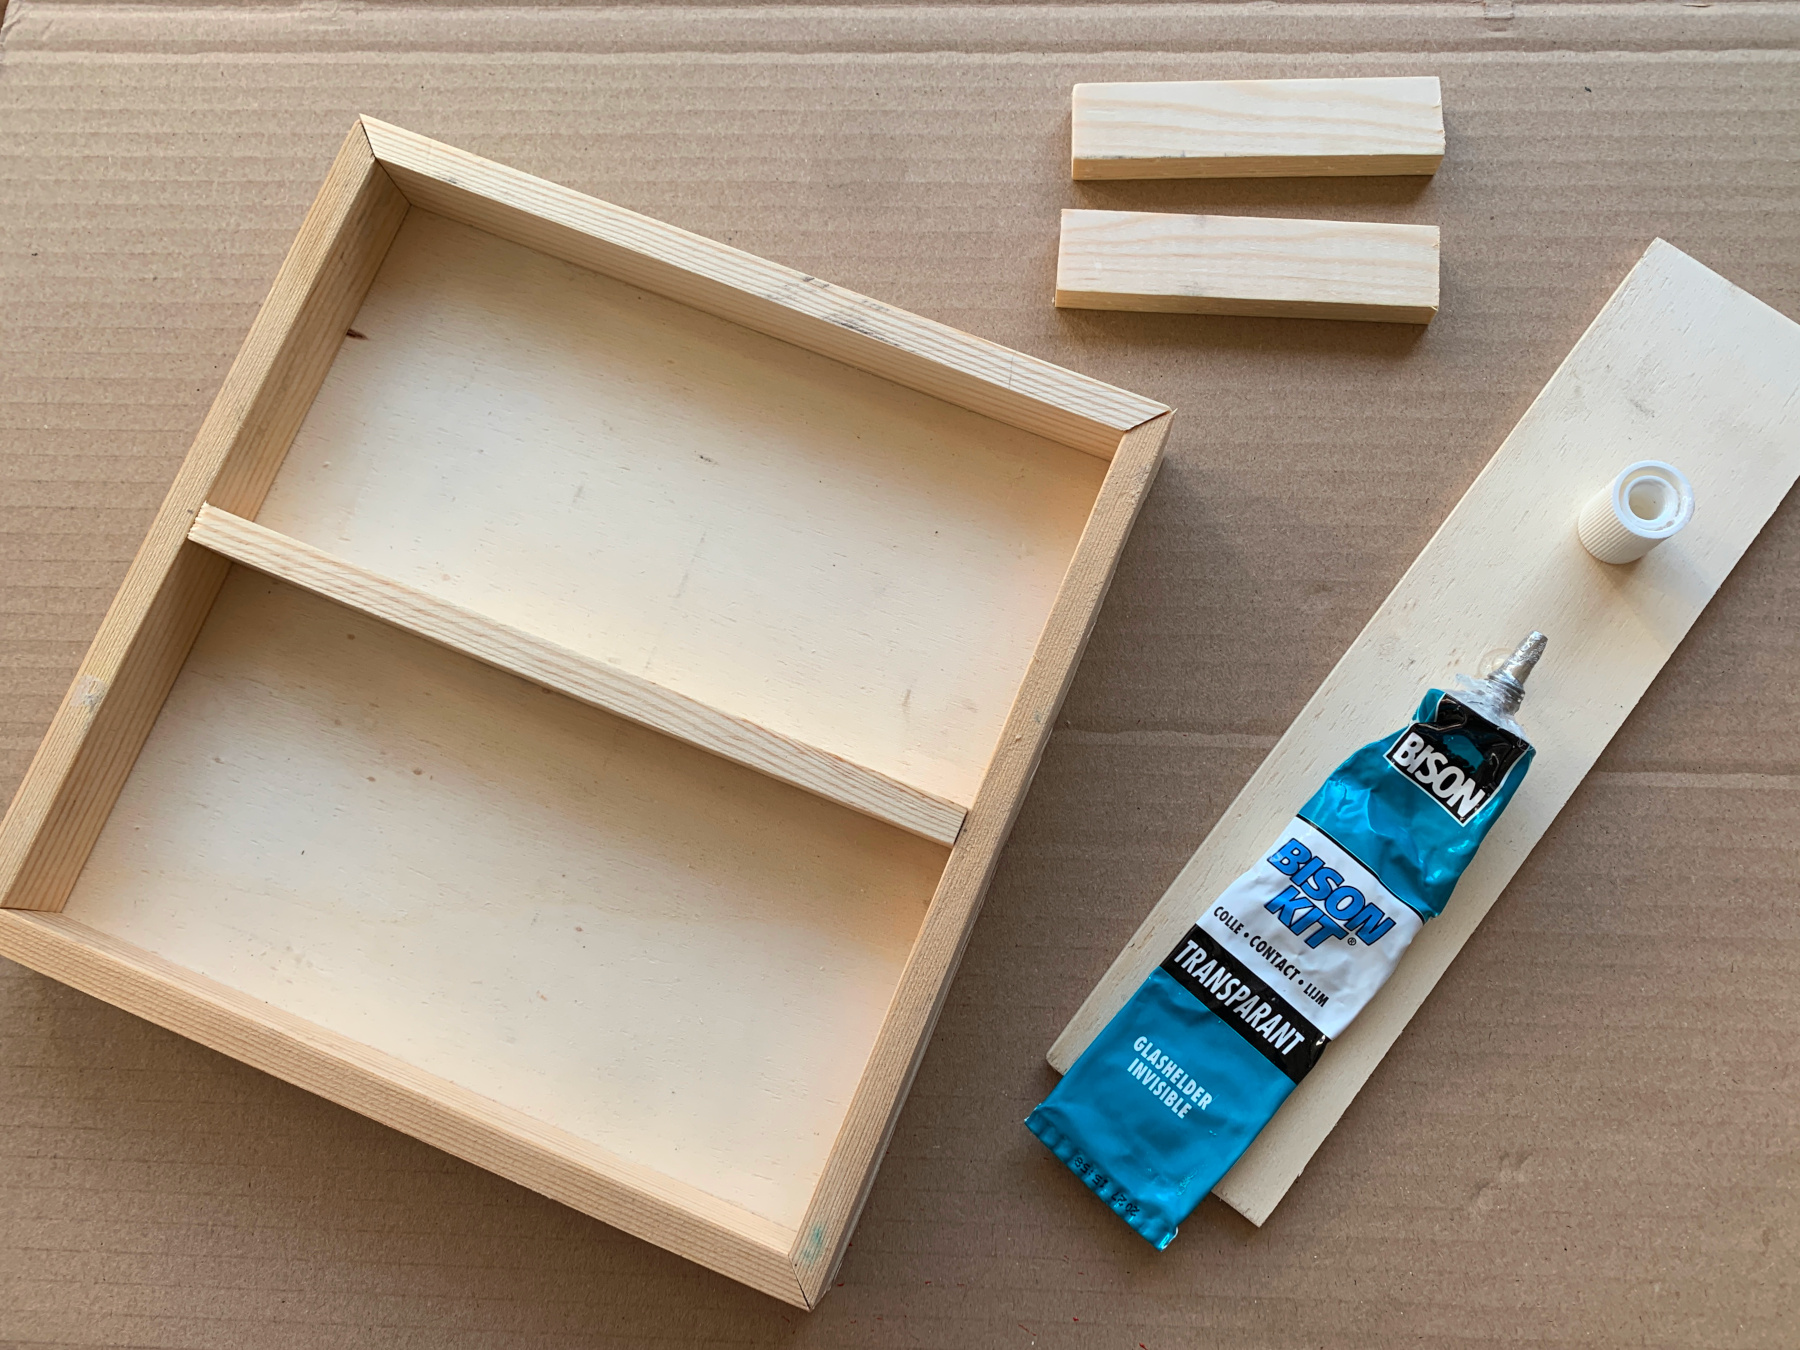

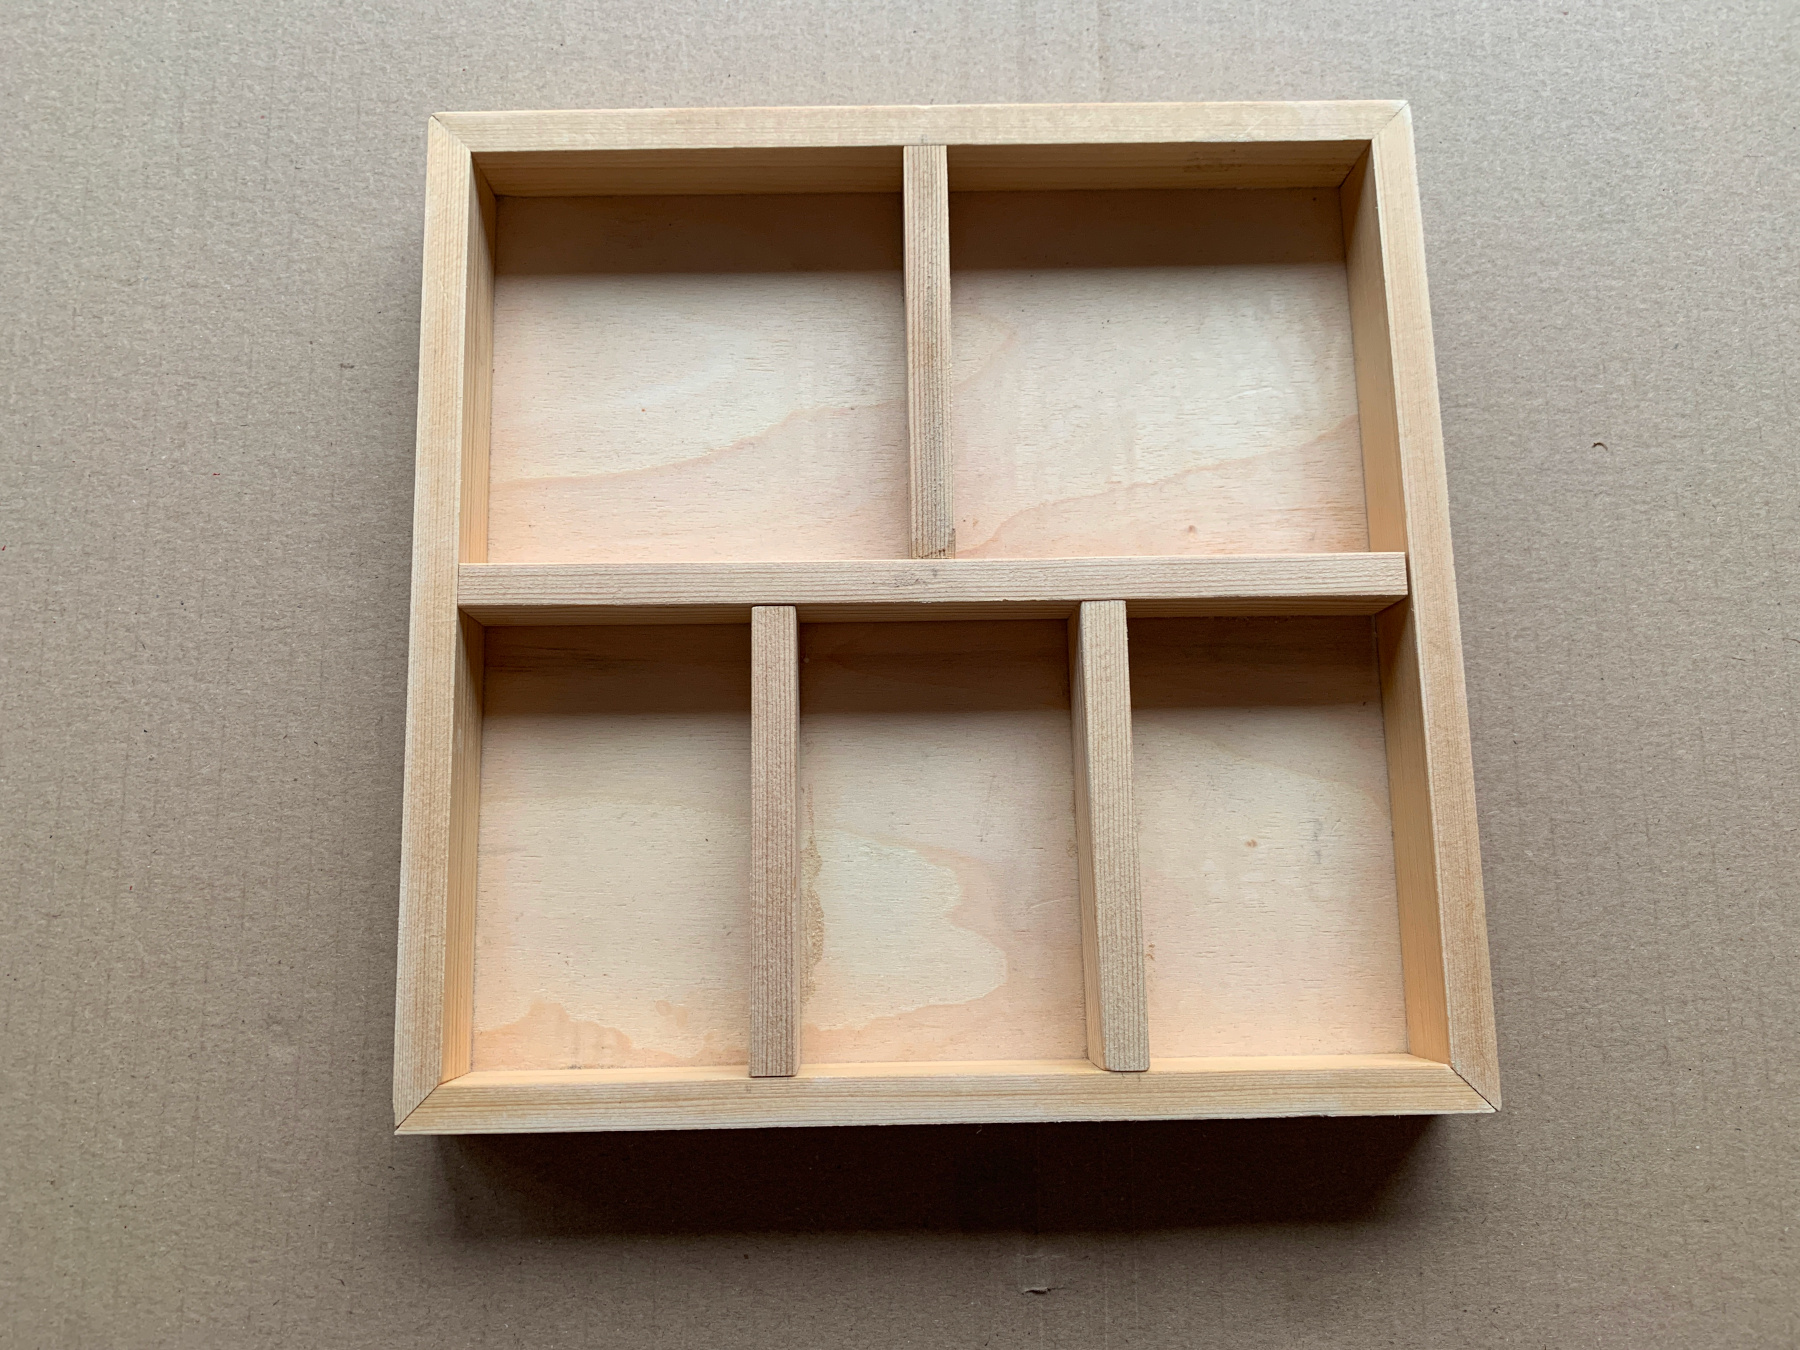
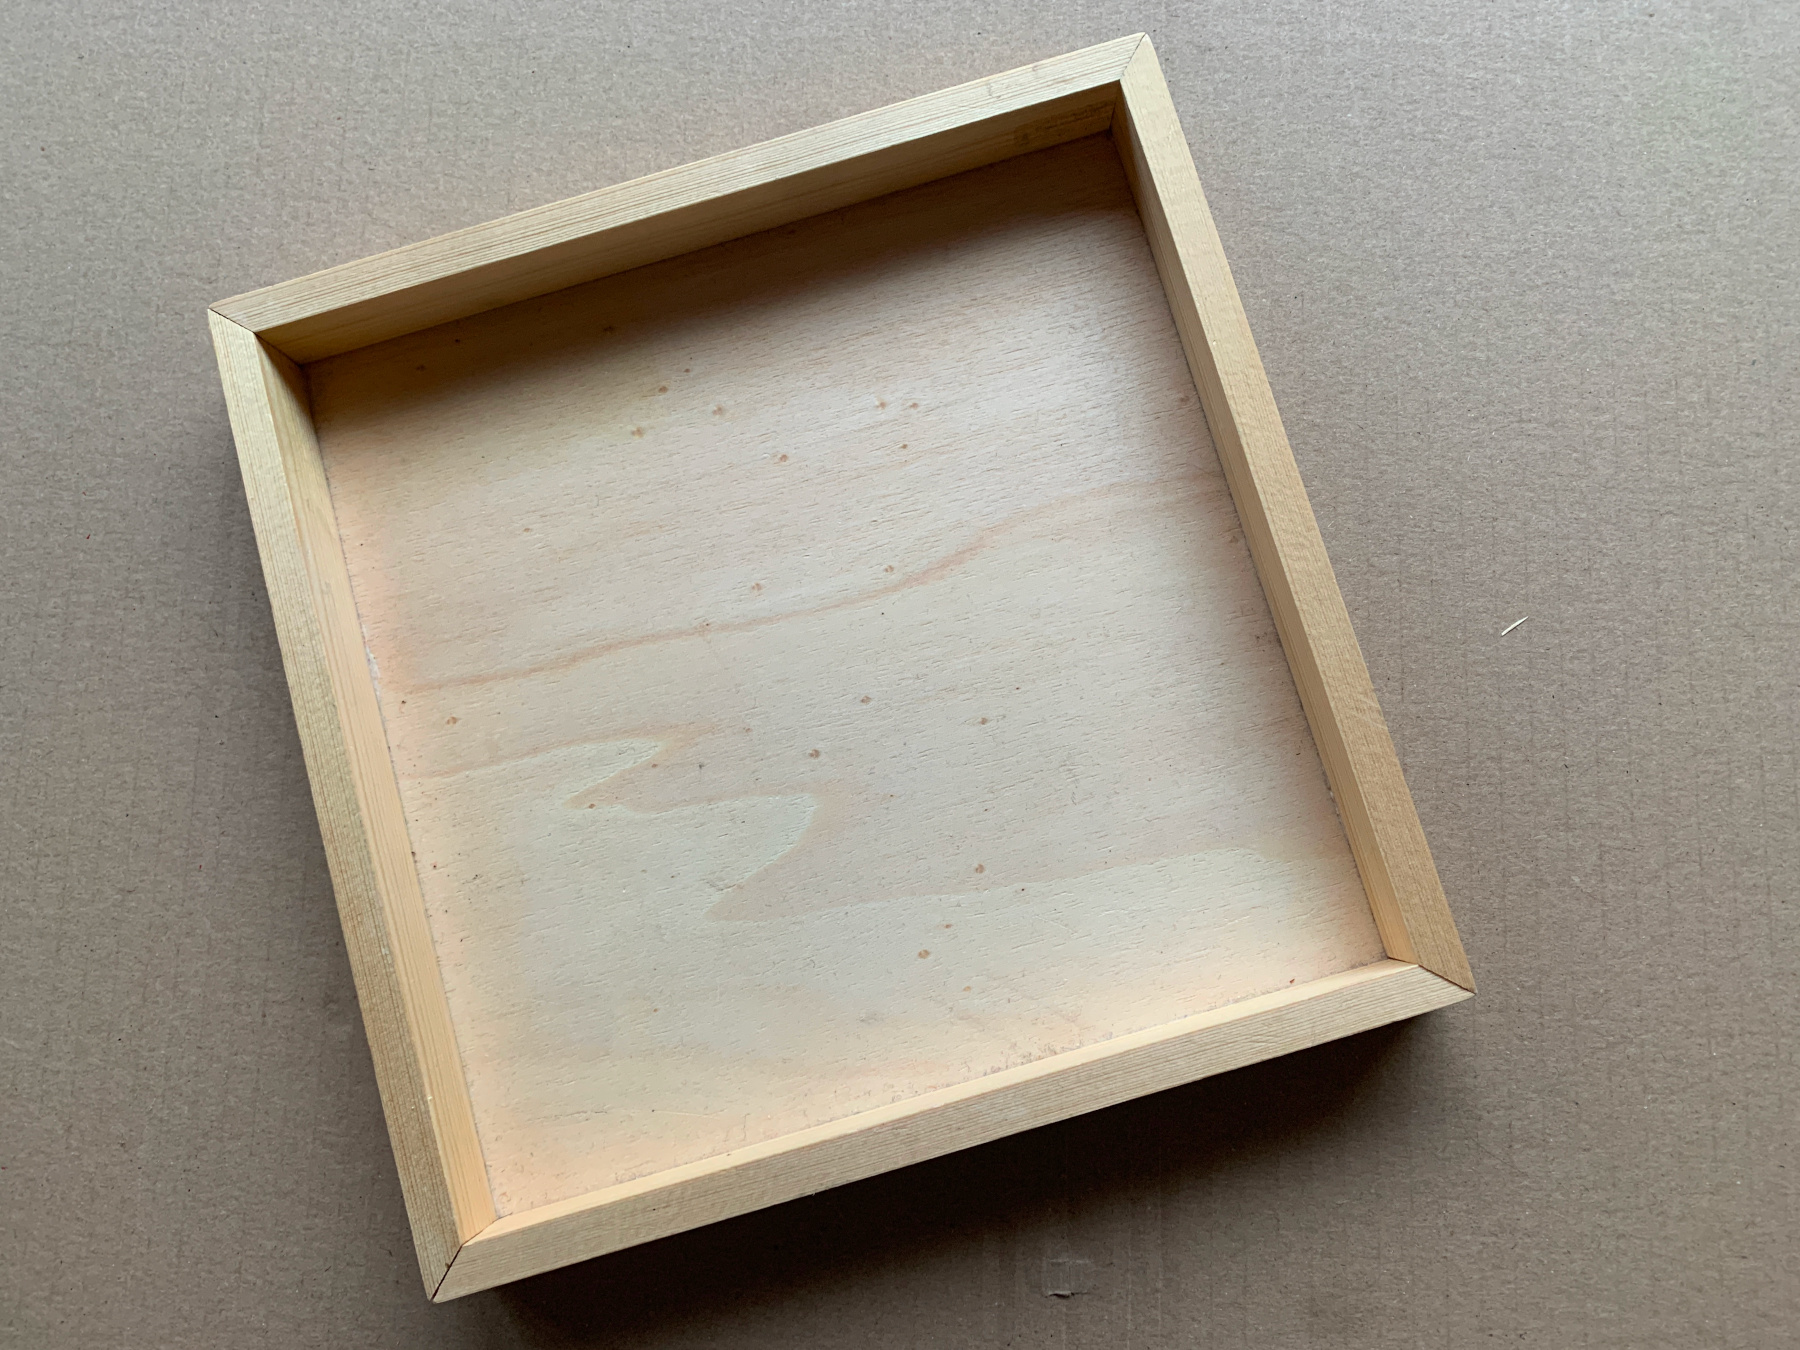
Stick the longest slat in the middle.
Make with the others 5 boxes.
Put on clamps and let the glue dry well.
That's where the collections come in, but don't think that's all of them!
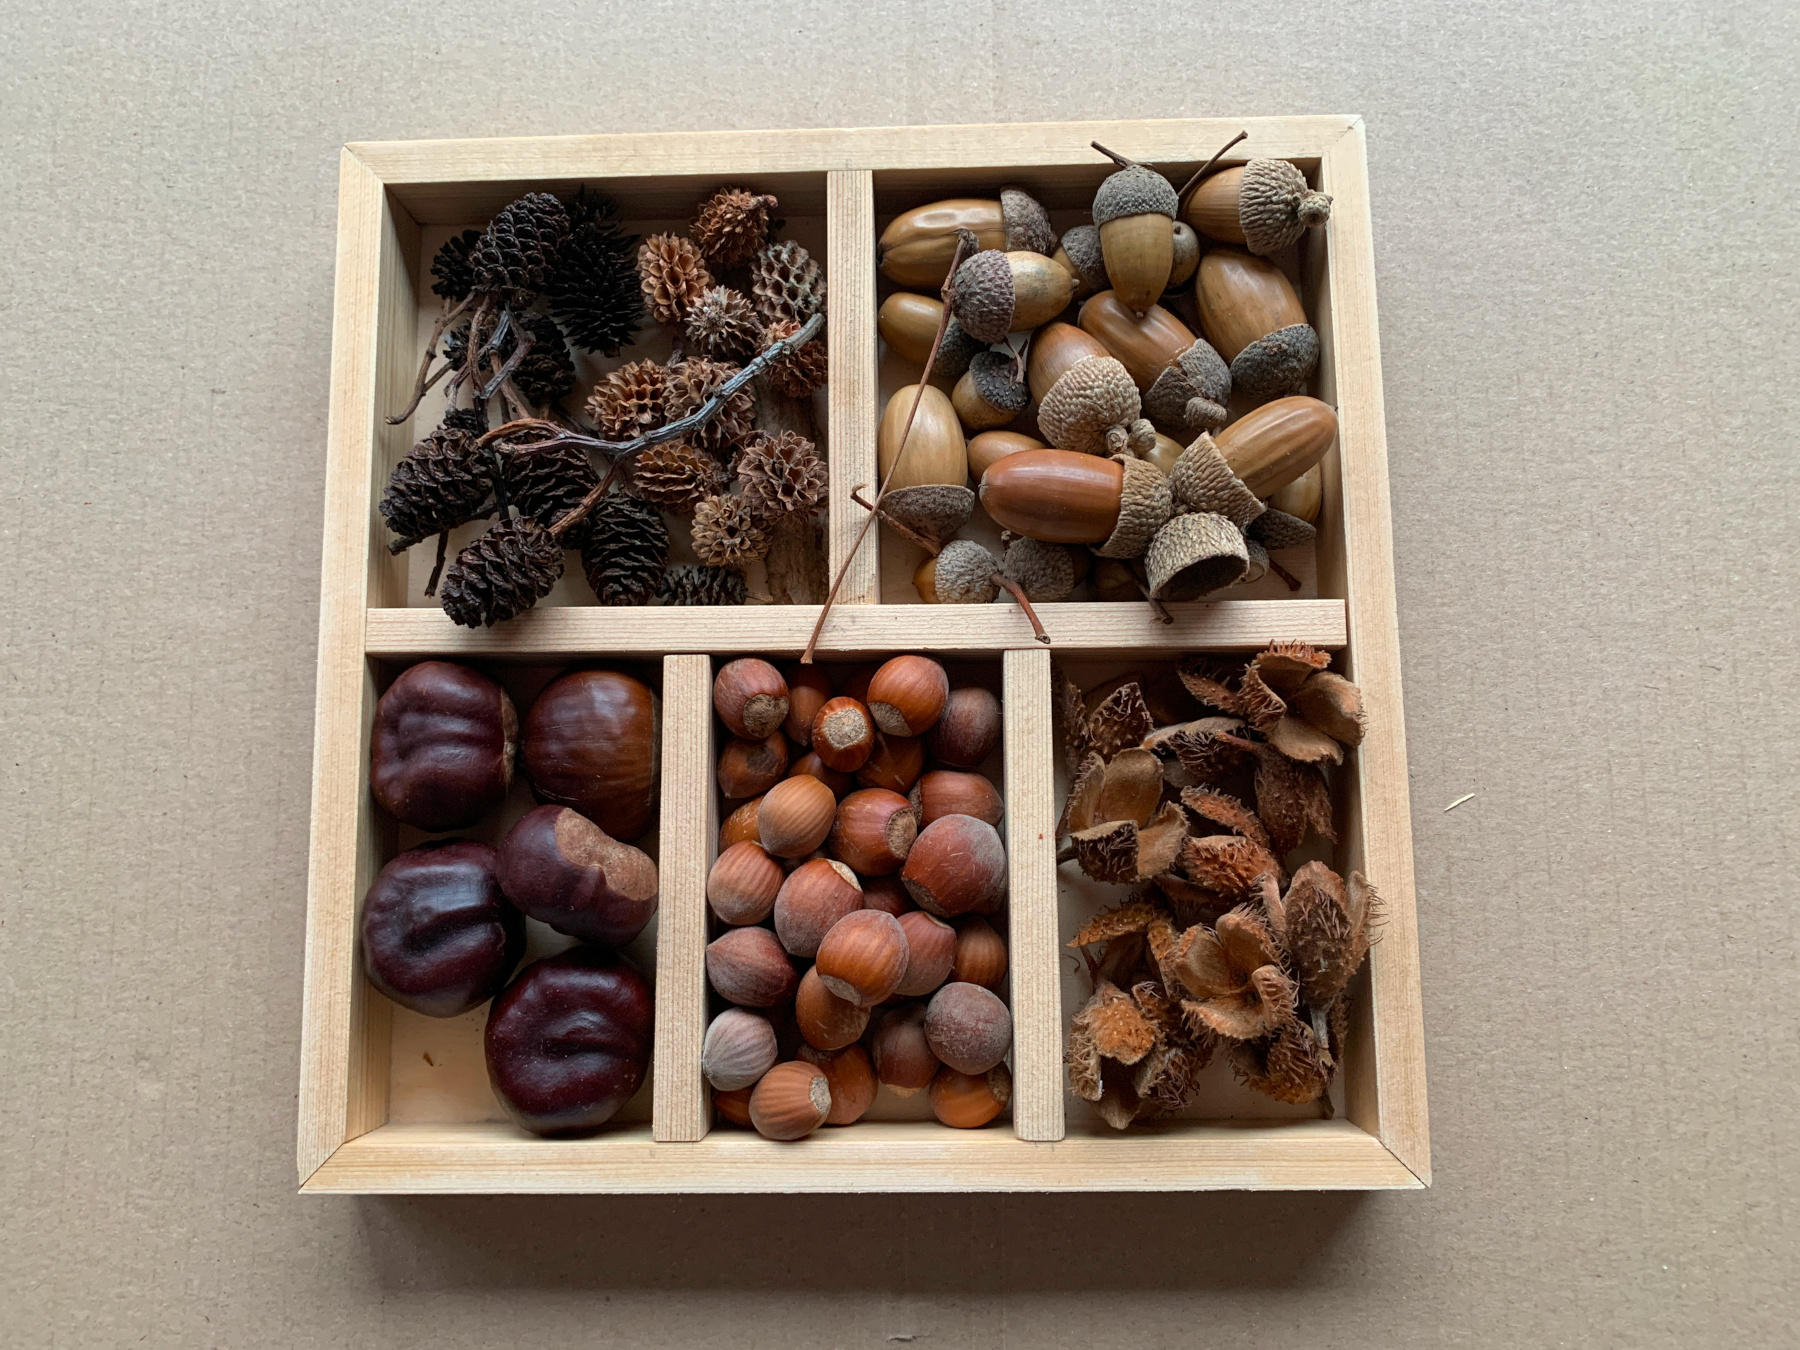
We have an Autumn Treasures collection.
These are the Summer treasures, all found while scavenging on the beach.
At the top of the page you see the stone collection, all found outside, on the way to school or last year while looking for sidewalk plants, or scooped up in the sandbox. Stones you can find everywhere! But see how beautiful they look in the sorting tray?
Next week we will make the last sorting tray, a difficult one, you will need a dad with a jigsaw! But you can download the template then.